# Apple iPhone and iPad
### POP/IMAP manual setup
[](https://wiki.rackcorp.com/uploads/images/gallery/2022-06/fUojpEJe90GyzRe4-image-1656323488764.png)
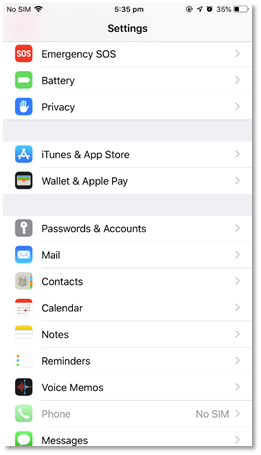
Figure 43 Navigate to the settings icon in your idevice, and then Passwords and Accounts
[](https://wiki.rackcorp.com/uploads/images/gallery/2022-06/E8Gv0nxGJyxvazHl-image-1656323496199.png)
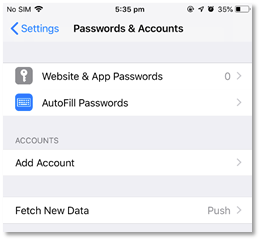
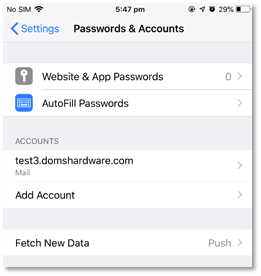
Figure 44 in the Settings -> Passwords & accounts page, hit Add Account. Fetch New Data should be Push
[](https://wiki.rackcorp.com/uploads/images/gallery/2022-06/FseyRhVlsS5JFRRJ-image-1656323513514.png)
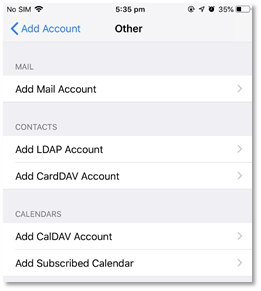
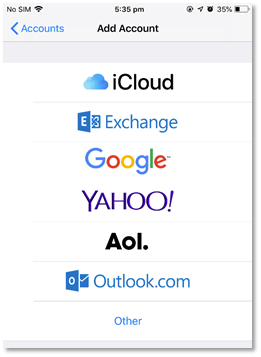
Figure 45 we are manually setting up an IMAP or POP account so choose Other
[](https://wiki.rackcorp.com/uploads/images/gallery/2022-06/dQzMLuBX7TySLKgR-image-1656323526830.png)
Figure 46 Under Other - Add Mail Account
[](https://wiki.rackcorp.com/uploads/images/gallery/2022-06/ouzsqiRvfHkPpGuK-image-1656323540640.png)
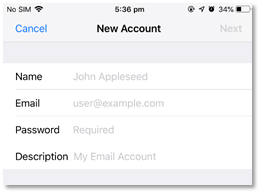
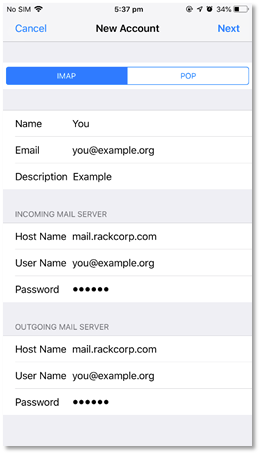
Figure 47 Fill in your email account details as requested
[](https://wiki.rackcorp.com/uploads/images/gallery/2022-06/ux6toodwpxqx0cxo-image-1656323549724.png)
Figure 48 fill in the email account and server details as illustrated
If you are using our Mongolian servers, please use **mail.mn.rackcorp.com** as the mail server.
[](https://wiki.rackcorp.com/uploads/images/gallery/2022-06/zjxrV9z1HuB3SN4F-image-1656323594389.png)
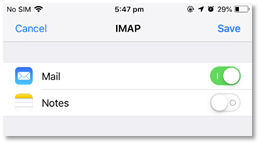
Figure 49 once your account details are saved and tested, you can choose what data to sync to the mail server, leave the default setting
[](https://wiki.rackcorp.com/uploads/images/gallery/2022-06/wJlDYV4b5S6uLG7T-image-1656323608297.png)
Figure 50 on success your email account is now added to the account list in iOS
### Exchange
[](https://wiki.rackcorp.com/uploads/images/gallery/2022-06/rukqcYfyHcXCuUGB-image-1656323639715.png)
Figure 51 we are setting up an EXCHANGE account
[](https://wiki.rackcorp.com/uploads/images/gallery/2022-06/SfJJSP17iYq5V5BL-image-1656323660888.png)
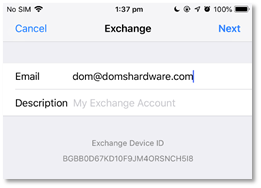
Figure 52 enter your email address for your exchange account
[](https://wiki.rackcorp.com/uploads/images/gallery/2022-06/EdhWQ6HOF386KyHA-image-1656323687668.png)
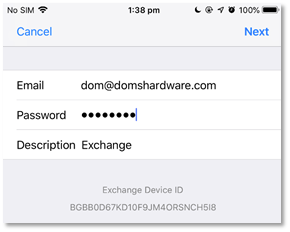
Figure 53 enter your password and create an account description
[](https://wiki.rackcorp.com/uploads/images/gallery/2022-06/ZDML6uE8uRMlvJ0d-image-1656323761877.png)
Figure 53 enter your password and create an account description
[](https://wiki.rackcorp.com/uploads/images/gallery/2022-06/fxQ1fQQ7o0s5kzk9-image-1656323772148.png)
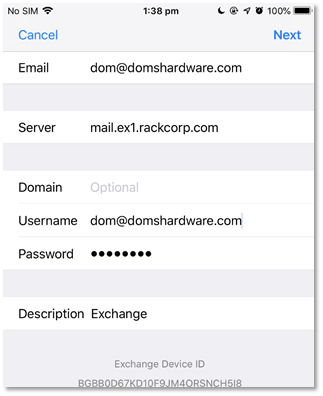
Figure 55 fill in your account details as follows
[](https://wiki.rackcorp.com/uploads/images/gallery/2022-06/xMW7V5szIQNh6XeM-image-1656323780830.png)
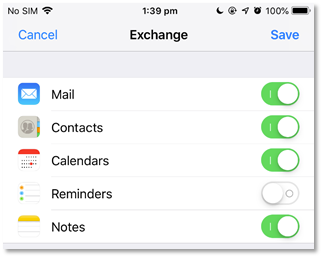
Figure 56 once your account details are confirmed and verified, you will receive a sync options screen. Choose here what options you want to sync to your device. Syncing contacts for example will overwrite your existing contacts and upload existing contacts