Guide for Outlook 2010,2013,2016,2019,2022 & Office 365
### Outlook 2010/2013/2016 - Standard E-Mail [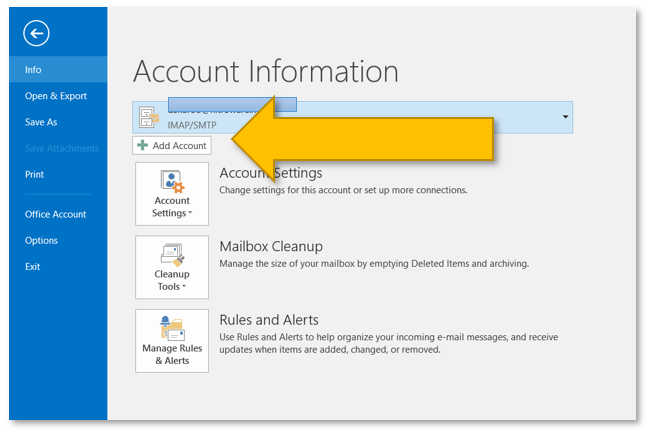](https://wiki.rackcorp.com/uploads/images/gallery/2022-06/3MNewn5BIsb6Hzmm-image-1656322814985.png) Figure 2 Microsoft Outlook account settings (File Menu)  Figure 3 Microsoft Outlook Add Account - Auto Setup  Figure 4 Enter your account password here if prompted during the auto setup process enter it. If you are also prompted to allow server settings, press allow 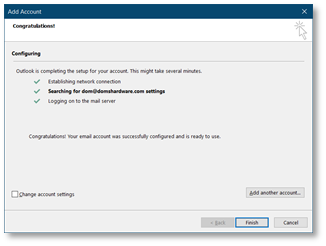 Figure 5 Microsoft Outlook auto account setup successful notfication 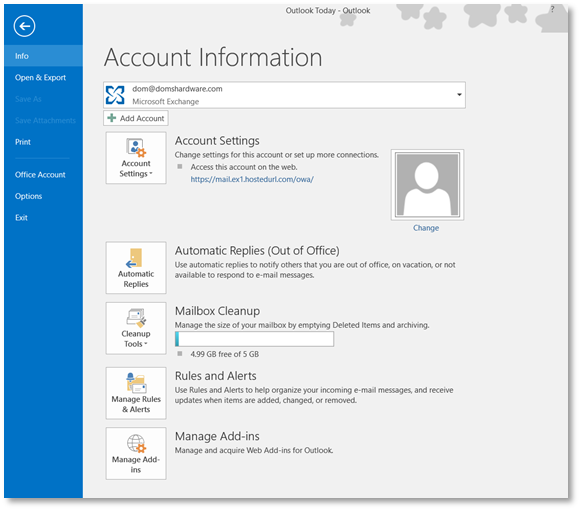 Figure 6 settings for your newly added account are available from the File menu in Microsoft Outlook and selecting the appropriate account from the drop down ### Outlook 2019/Outlook 365 - Standard Email The setup screens for both these versions vary to other versions of versions of Outlook so verbal setup instructions will not be fully applicable. [](https://wiki.rackcorp.com/uploads/images/gallery/2022-06/5q3MZ5Be2SL7TGb2-image-1656323004435.png) Figure 7 Microsoft Outlook account settings (File Menu) [](https://wiki.rackcorp.com/uploads/images/gallery/2022-06/JUWWl5yA1q6Hpfgx-image-1656323008992.png) Figure 8 enter your email address in the Outlook welcome screen and tick manual setup [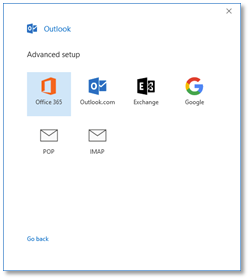](https://wiki.rackcorp.com/uploads/images/gallery/2022-06/vaSVMQb86AbWTKnP-image-1656323021228.png) Figure 9 Choose from IMAP or POP email accounts. IMAP is recommended. [](https://wiki.rackcorp.com/uploads/images/gallery/2022-06/H0GDu6Kuomoexlnd-image-1656323039887.png) Figure 10 complete the email settings as illustrated, incoming and outgoing mail servers, encryption and ports If you are using our Mongolian servers, please use **mail.mn.rackcorp.com** as the mail server. [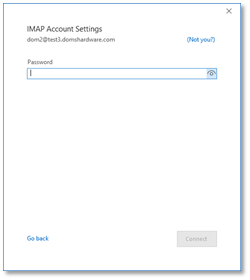](https://wiki.rackcorp.com/uploads/images/gallery/2022-06/TqFsUxD2tVu5TVI3-image-1656323047556.png) Figure 11 complete the password for your email account [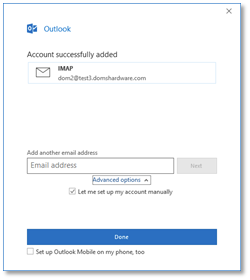](https://wiki.rackcorp.com/uploads/images/gallery/2022-06/SgYc2eiZLSVusW5B-image-1656323056881.png) Figure 12 Outlook welcome process is a success message. There is a optional link selected by default that leads to a webpage describing how to install Outlook for mobile. ### Outlook 2019/Outlook 365 - Hosted Exchange [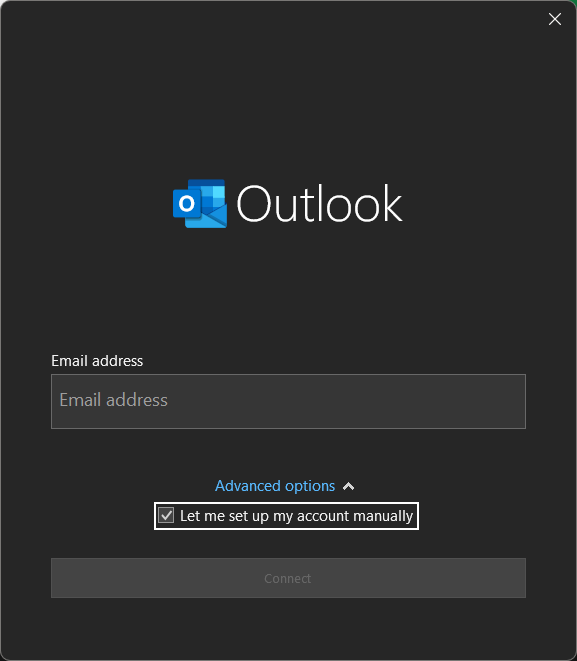](https://wiki.rackcorp.com/uploads/images/gallery/2024-03/oEJmxDZl3ZvTYkux-1-add-email.png "Add a new account to outlook. Note the exact screen varies version to version") Figure 13. Add a new account to outlook. Note the exact screen varies version to version [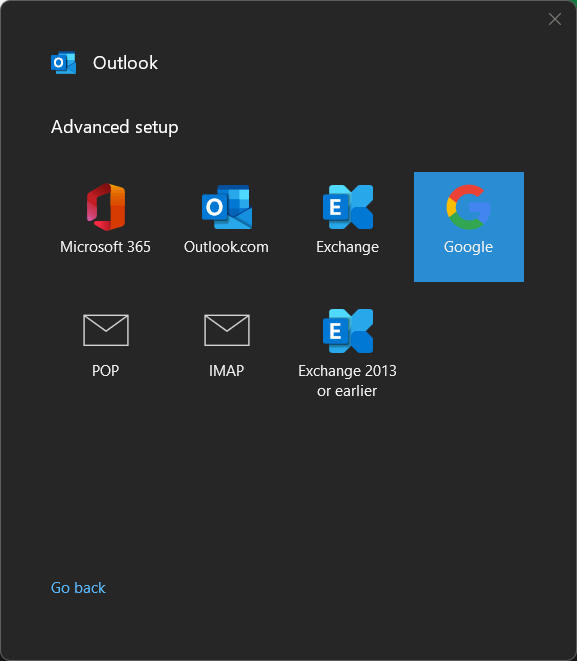](https://wiki.rackcorp.com/uploads/images/gallery/2024-03/apkFz5x0PtNsDQBu-2-select.png) Fig 14. Choose **EXCHANGE** from the email selection [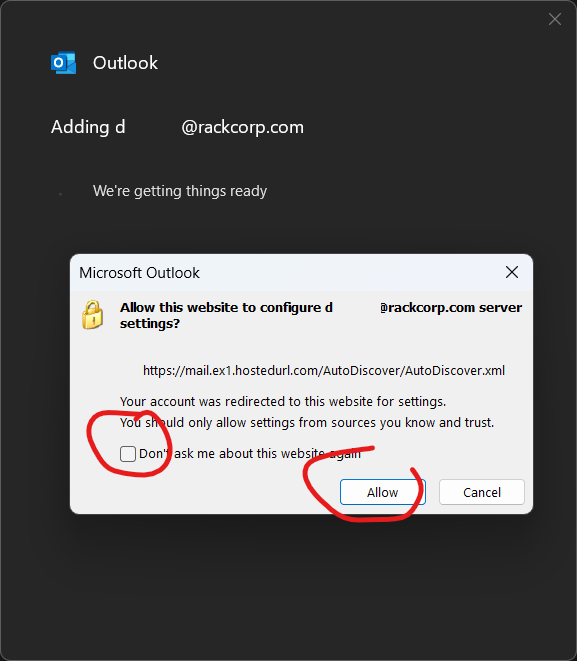](https://wiki.rackcorp.com/uploads/images/gallery/2024-03/uR6CKB7ySOXctZE0-3-perm.png) Fig 15. A permissions popup will appear soon after. Select The options circled in red as screenshot. The popup might be hidden or obscured by outlook. [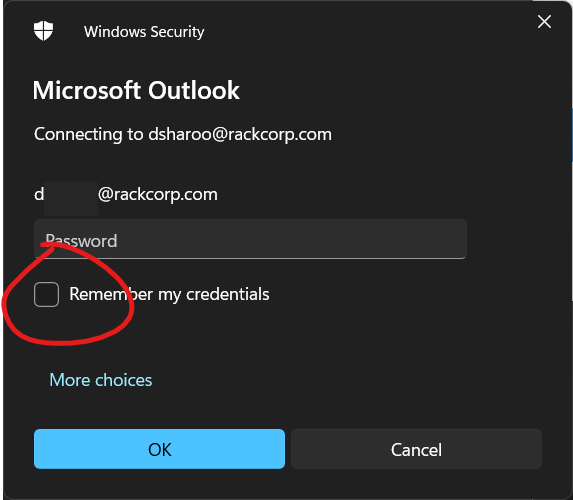](https://wiki.rackcorp.com/uploads/images/gallery/2024-03/0ZDRqazP0i3R1zBS-4-password.png) Fig 16. enter your exchange password. Selecting Remeber my Password is optional. [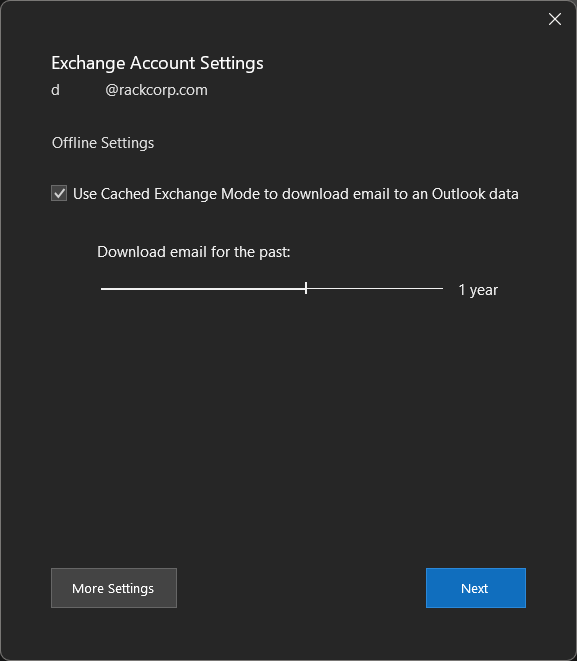](https://wiki.rackcorp.com/uploads/images/gallery/2024-03/Q1ysY9Kng87g5E8V-5-options.png) Fig 17. If your password is correct you will be presented with options. The defaults are sufficient. [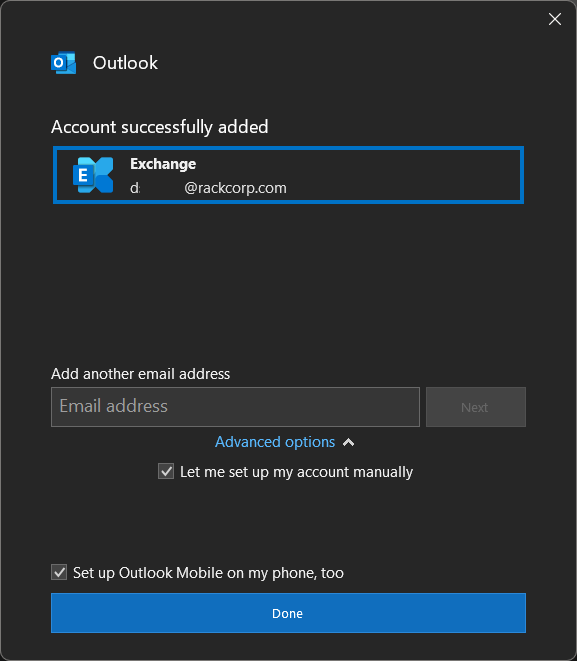](https://wiki.rackcorp.com/uploads/images/gallery/2024-03/gB1zPTMslvCVpCsy-6-confirm.png) Fig 18. Final Notice of Successful Addition of account