We strongly recommend that a separate physical device such as a phone, tablet or hardware key be used for multi factor authentication.
Google authenticator for mobile devices can scan the generated QR code using the device camera to retrieve the token key and setup your authentication. For desktop authenticators such as a YubiKey hardware key, a screen capture function is available where it can capture the generated displayed QR code from the screen. Otherwise for applications such as WinAuth you will need to copy and paste the URL to the QR code image or manually input the key code into the authenticator.Once the key generator window is closed, your keys are no longer accessible using this function and need to be regenerated and you are returned to your user details.
--- ### 5. Performance check Once your authenticator is setup, it is advisable to test it before setting your user preferences to enforce Two-Factor Authentication on login, should the key be wrong technical support will need to reset the users access. Navigate to **POWER** and click **LOGOUT** [](http://wiki.rackcorp.com/uploads/images/gallery/2021-11/image-1637238969363.png) You are returned to the RackCorp portal login at portal.rackcorp.com or your company's white label link [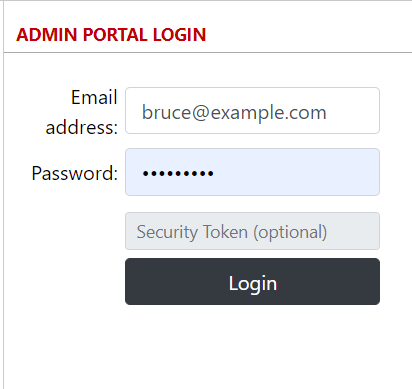](http://wiki.rackcorp.com/uploads/images/gallery/2021-11/image-1637239058915.png) At this step, using your new authenticator to generate the Security Token and input it into the field and login, log back into the portal. Should this be successful progress to step **6**. otherwise check your authenticator for most current code or contact RackCorp Technical Support. --- ### 6. Configure security token for a user Should you login successfully after configuring 2FA, The final step to Security Token setup is to select whether two factor authentication is mandatory required or not on login by selecting **REQUIRED** or **NOT REQUIRED**. [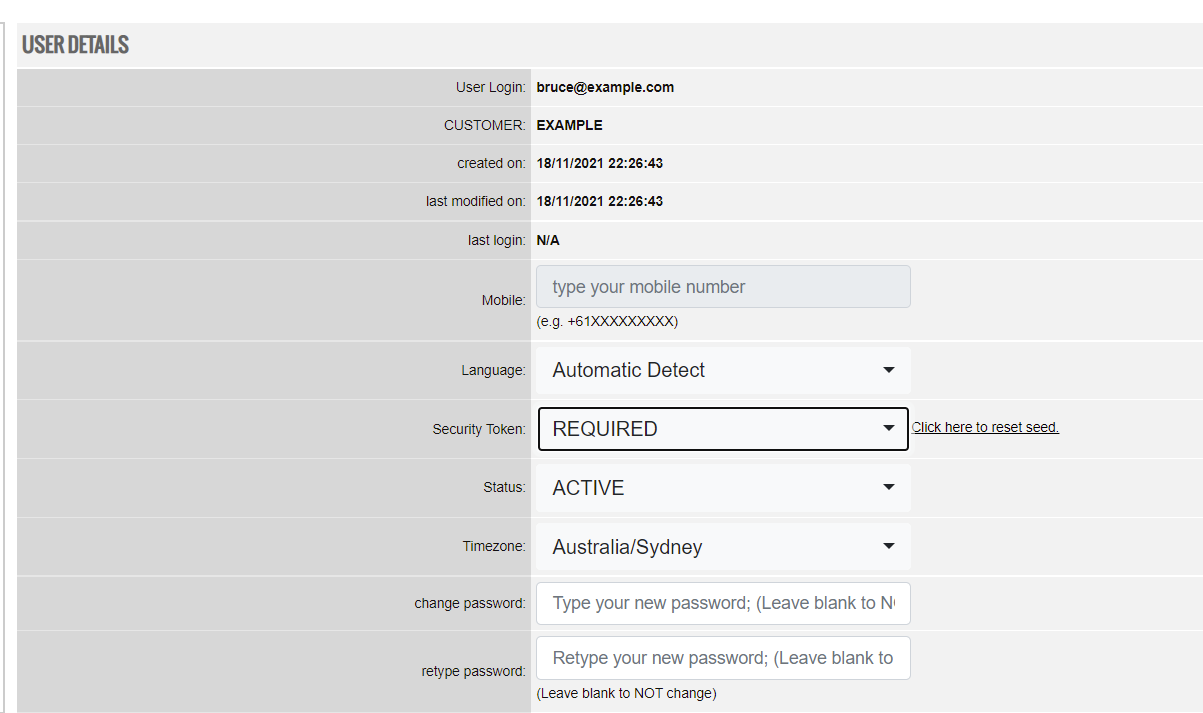](http://wiki.rackcorp.com/uploads/images/gallery/2021-11/image-1637237332766.png) --- ### 7. Final test Perform a final test of your new 2FA settings. As per step **5,** log out of the RackCorp Portal and then login using your newly setup Two Factor Authentication in addition to your username and password. You should have be able to login successfully and can continue using our services.