Getting started with S3 storage on RackCorp Hybrid Cloud
This document will cover the basics to get up and running to use RackCorp’s S3 storage service, including setting up access keys and secrets, creating buckets and transferring/manipulating your files via a number of third party client applications on Windows.
There are several ways to host your files on RackCorp S3. This document focuses on Windows Clients but most applications are also available for Mac
- FTP style application (browser)
- Mounted Drive Letter application (drive)
- API access for modern web applications.
You are free to use a S3 compliant application of your choosing, although the following applications are validated with our service and for which we can provide limited support and assistance.
OBJECT STORAGE
- S3 compatible object storage contains one or more storage buckets; each bucket contains a number of widgets.
- Each widget has a unique ID.
- Each widget has some meta data describing attributes of the object such as dates or revisions
- Inside each widget is some data we want to access.
- We are able to sort through the widgets that are in these buckets until we find the one we are looking for.
1. Create your S3 credentials in RackCorp Portal.
The Storage tab in RackCorp Portal manages your CREDENTIALS and BUCKETS
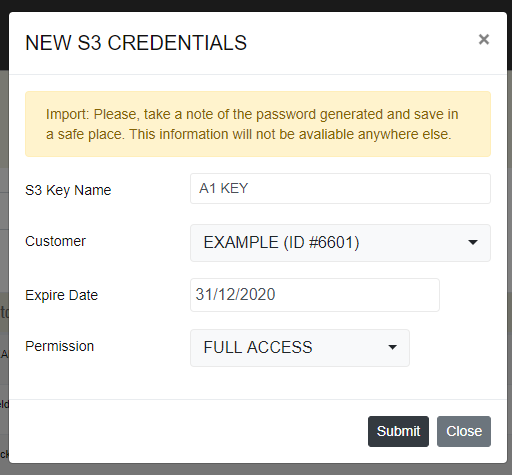
1.1 Start by adding a new credential. Give your new key a descriptive name, e.g. Employee name, Client or contractor name. Try to keep this distinct compared to what you name your buckets later.
Think of your access key as your username
Think of your ‘secret’ key as your password.
1.2 Choose the customer in the dropdown field. This would be either your company/client name or a sub-customer/sub-client. You would have originally setup any sub-customers in the RackCorp portal under the Customers section.
1.3 Define an optional expiry date for the key. If you are going to be issuing an amount of keys this is a good way to track of authorised access.
1.4 Define the Read/Write Permission for the credential. This is ideal if you would like to create a credential for someone that you would like to share files with, or to freeze files.
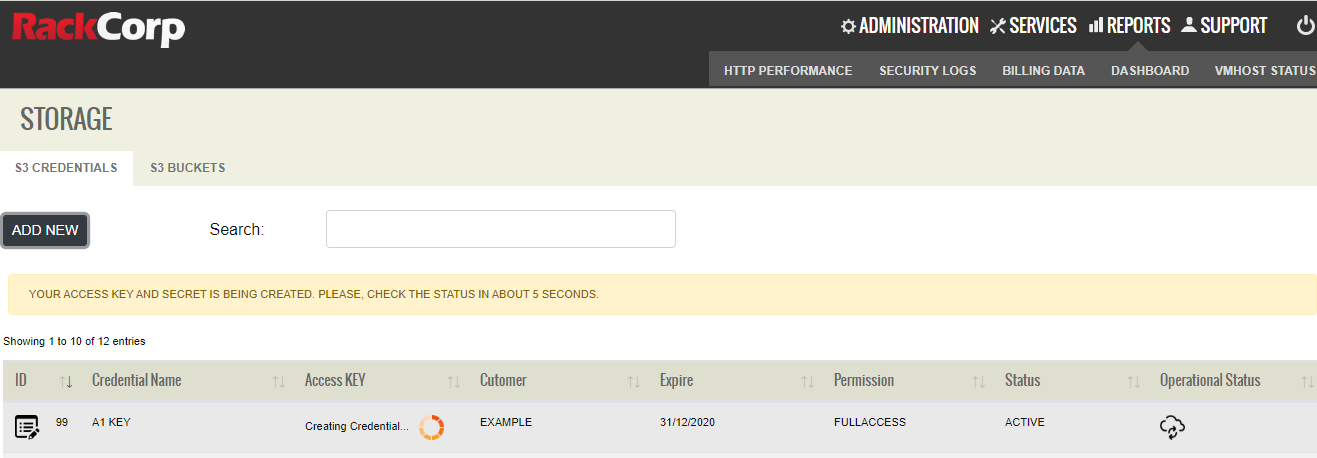
Once you have created or updated your key, a summary result is displayed. A progress spinner is displayed while your keys are generated and a green tick means they are ready to view.
Click on the access key to retrieve your access key and secret. This is a ONE-TIME PROCESS.
TAKE A NOTE OF YOUR ‘SECRET’ DISPLAYED IN THIS POPUP.
It is NOT retrievable.
You now have the three elements needed to securely access your files in RackCorp S3
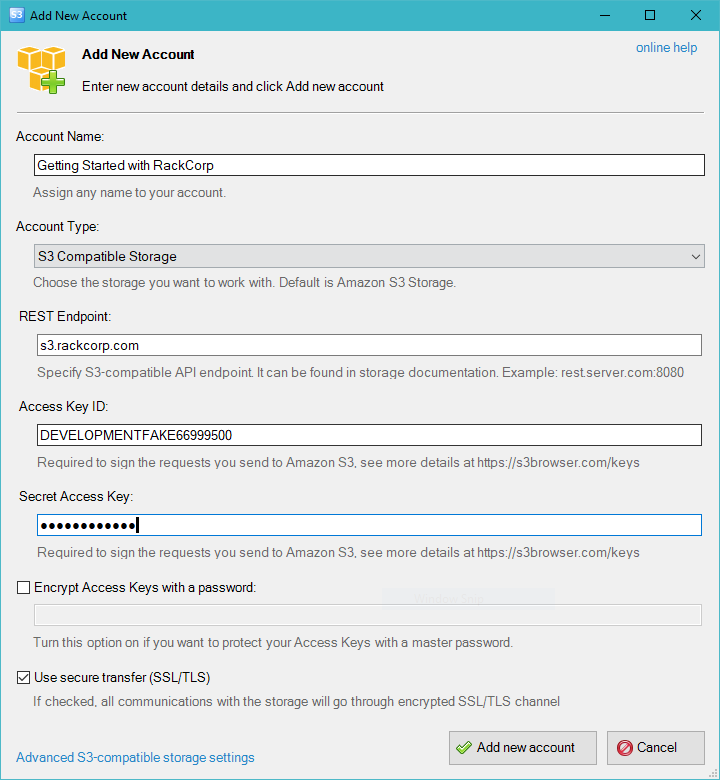
Your endpoint URL: For some of our customers we will setup a custom URL, In this document we will use s3.rackcorp.com as an example.
-
Your ACCESS KEY : Retrievable from the portal
-
Your SECRET : A one-time code displayed in the portal
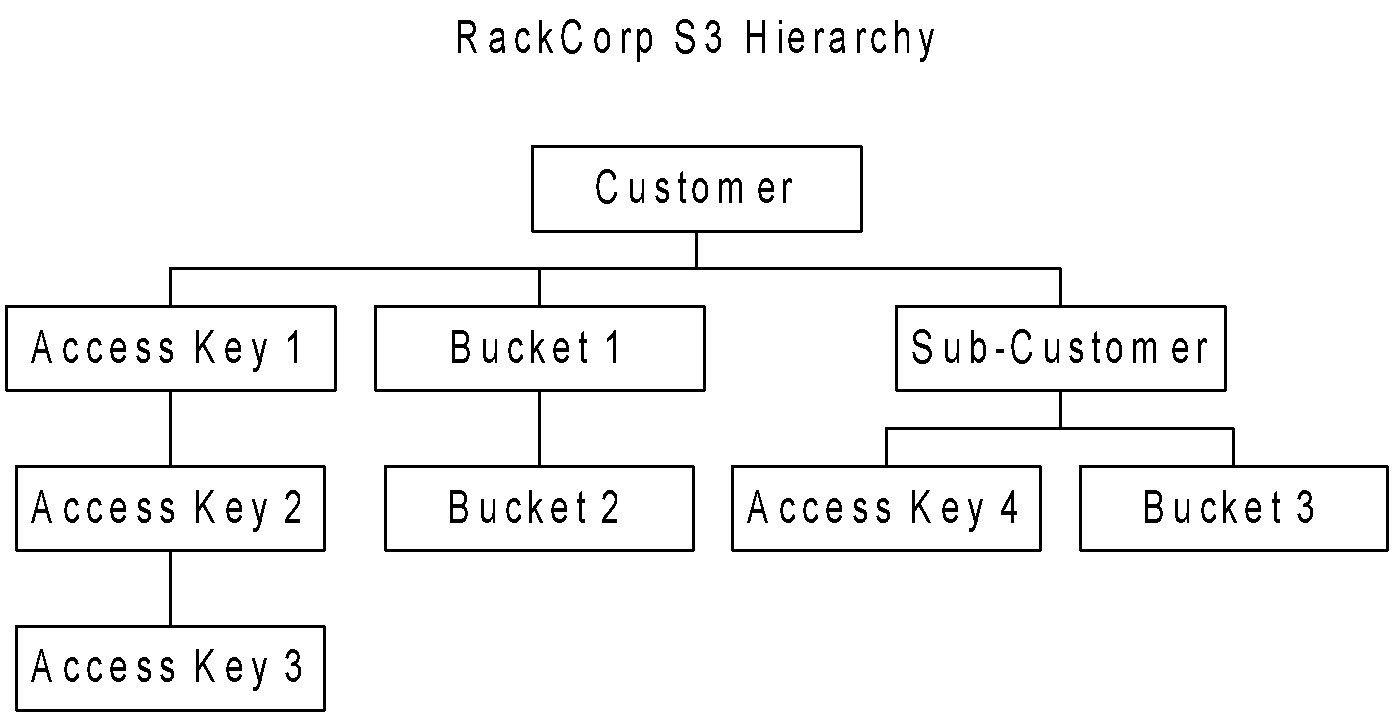
In RackCorp S3, there is a many to many relationships between access keys and buckets. This means all keys created under a customer can access all the buckets created under that customer.
2. Create your S3 buckets.
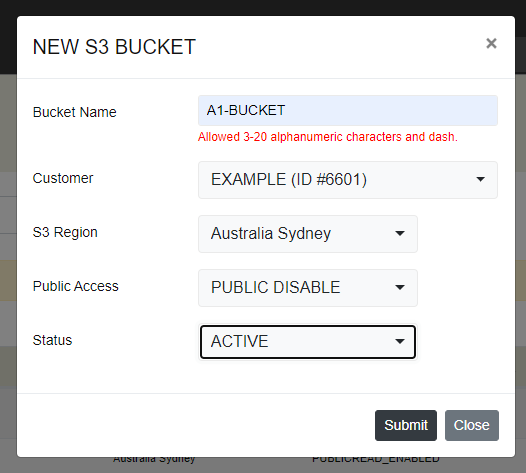
2.1 Define a descriptive name for your bucket. The name should reflect what the bucket’s purpose is. Such as `TropicalHolidayProject` or ‘a1bucket’ in our example.
For bucket names please use alphanumeric characters, dash and no spaces.
2.2 Choose the customer in the dropdown field. This would be either your company/client name or a sub-customer/sub-client. You would have originally set up any sub-customers in the RackCorp portal under the Customers section.
2.3 Choose the region for where you would like to store your buckets. In this drop-down we list common regional options and these options may vary per customer. If these do not suit you contact our support department who can define manual region rules for you. An example S3 Region might be “Australia”, which would encompass several physically distinct data storage locations; “Australia - East” for NSW and Victoria or “Philippines and Hong Kong”. The field has been pre-populated with two of our NSW datacentres, a Sydney region covering both as well as Thailand.
2.4 Access Policy determines whether your access key is required to access this bucket. You could typically use this option to enable public web content
PUBLIC ENABLE = No key is required to access the bucket.
PUBLIC DISABLE = Access key is required to access the bucket.
2.5 Status is simply an enable/on-off toggle for the container.
2.6 Wait for your bucket to be added.
3. Configure your S3 application with your credentials.
We will demonstrate two types of windows applications as client examples for RackCorp S3. A ‘FTP’ style application and a drive-letter type app, where buckets are mounted as windows drive letters, allowing files to be natively accessed by windows applications without having to GET or PUT them from the S3 server first.
3.1 FTP Style S3 Clients
These require your files to be downloaded to your computer and then uploaded back to the server when needed.
These types of clients are ideal for managing files that are not often edited and for which you may require additional features to manipulate your files and buckets.
3.1.1 S3 Browser freeware
Accounts -> Add New Account to setup your keys in the client
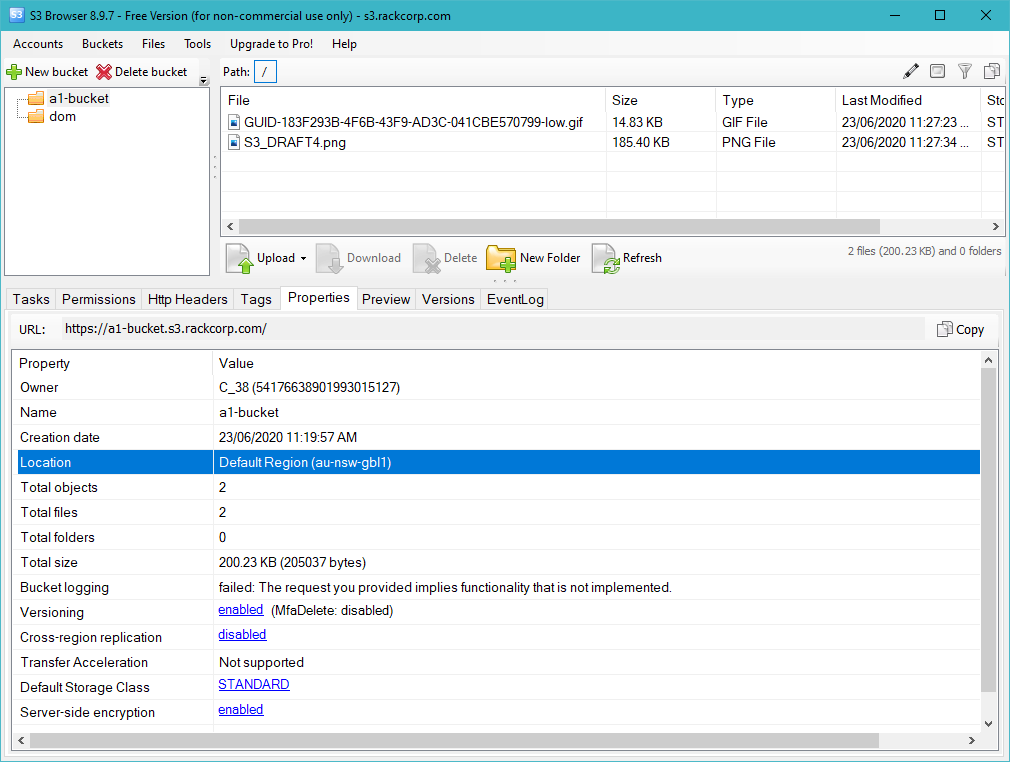
For ‘S3 Browser’, simply drag and drop your files between your PC and your bucket.
We can see here that our credential has access to two buckets as that’s what we created in the portal.
3.2 Drive Letter mount clients
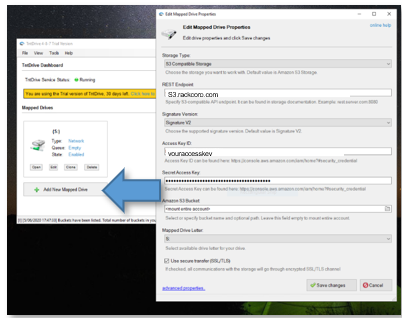
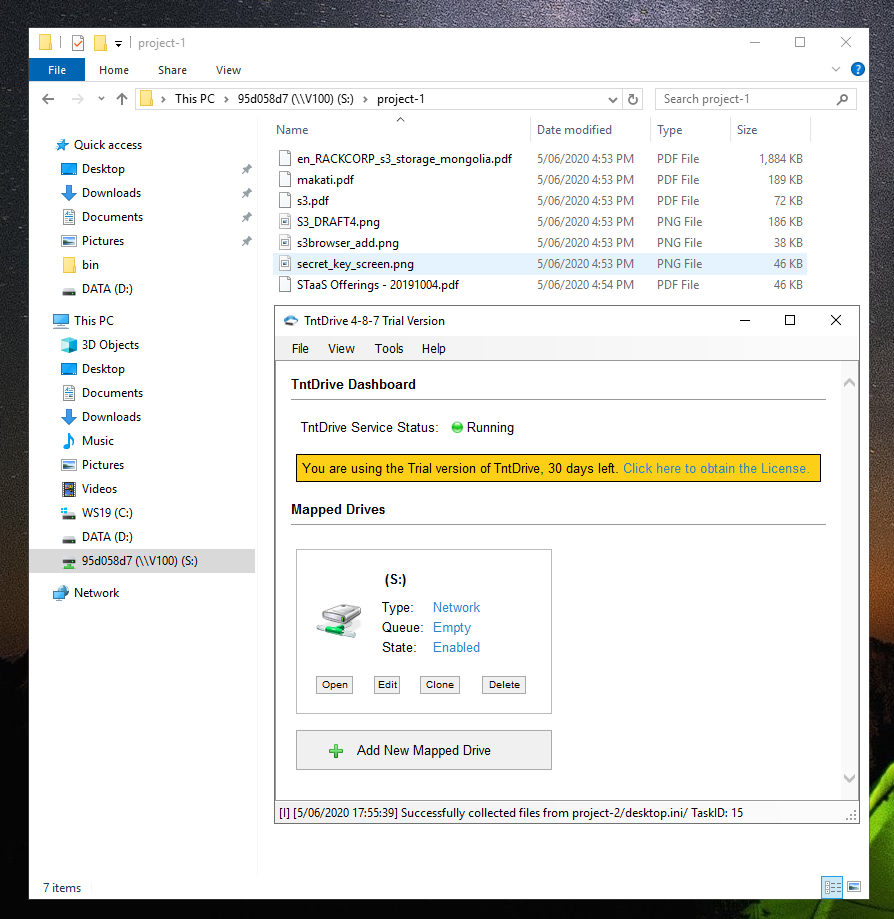
These applications mount each bucket a driver letter in windows explorer, allowing you to manage your files as if they are native in your windows system. Downloads/uploads occur when you copy files to/from that particular drive letter/bucket.
These are better for managing large numbers of content rich files that would be edited by the end user such as photos text or video, and for those who would like ease of use.
3.2.1 TNT drive trial
4. Advanced Features
This document is intended to get you up and running with the RackCorp S3 Storage service using popular Windows client applications.
To use advanced features like file versioning, encryption, Access Control Lists, cross-region replication, Transfer Acceleration, bucket logging and API access, please contact your account manager for additional information. These features may require specific settings or regions to work.
Document History:
005: Multi Language support
004: Add support and usage guidance for Cyber Duck and Mountain Duck from iterate GmbH


