Increasing and Resizing Linux Virtual Machine Disk space
For RackCorp Cloud VM installer version of Ubuntu 20.04 Only
This guide DOES NOT apply to self installed OS. DATA LOSS MAY OCCUR
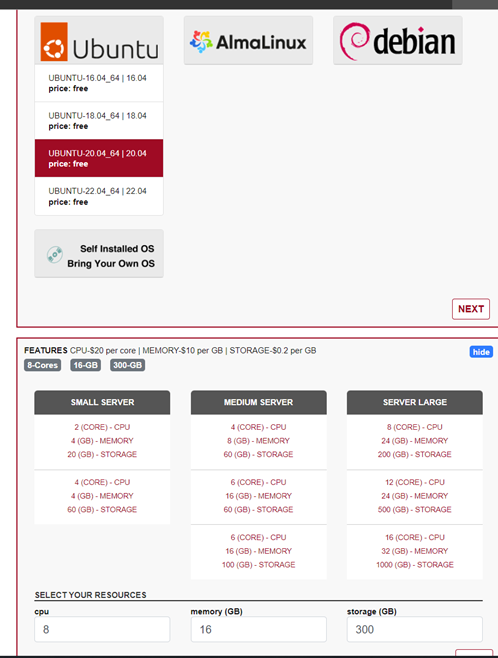
Use our ‘add a server’ tool in the RackCorp Portal
For this example, deploy a server with 8 core, 16GB RAM and 300GB DISK as shown. Critically for disk expansion to succeed, we are assuming and reling on that the chosen OS is RackCorp’s cloud image of Ubuntu 2004.
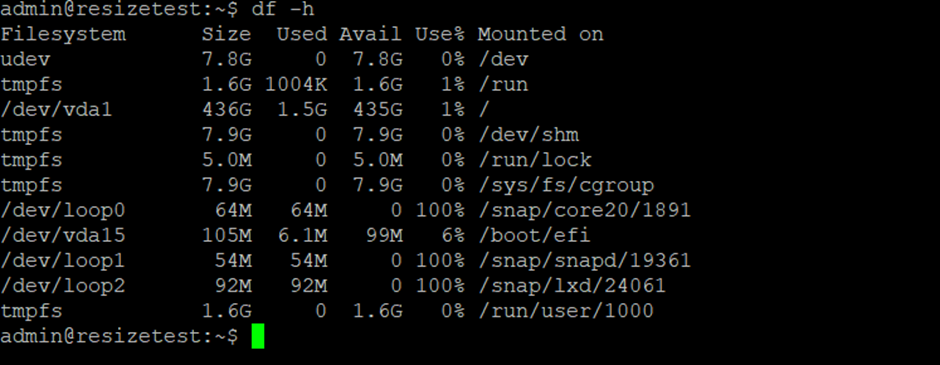
The OS will take a minute or two to deploy. Once it is ready boot it and run
Df -h
It should display 300G for the Linux partition
POST-RESIZE IN PORTAL
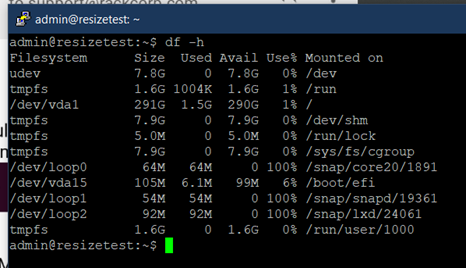
Resize to 450GB. ShutDown VM in Portal. Restart VM.
Follow the steps to resize the 300G Linux Partition to 450G
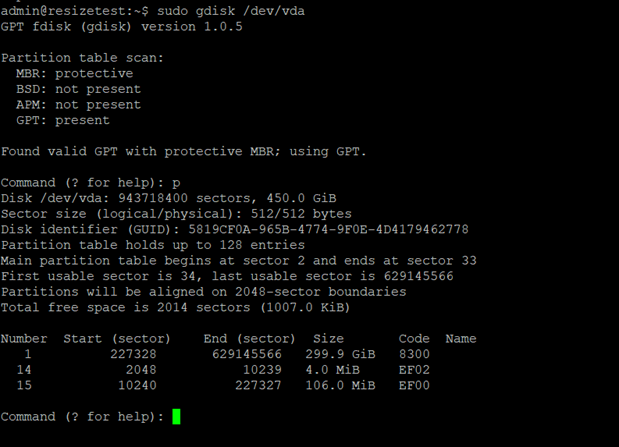
We can view the partition table using:
sudo gdisk
Where partition #1 is the main OS partition and partition 14,15 at the BEGINGING of the disk are Boot and System Partitions
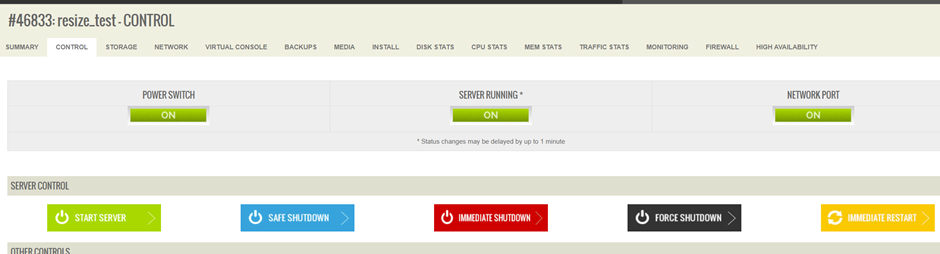
Safe shutdown the OS (via the OS or the SAFE SHUTDOWN button in the RackCorp portal)
RESIZE the disk to the desired size , ie 450GB


Boot the OS and run
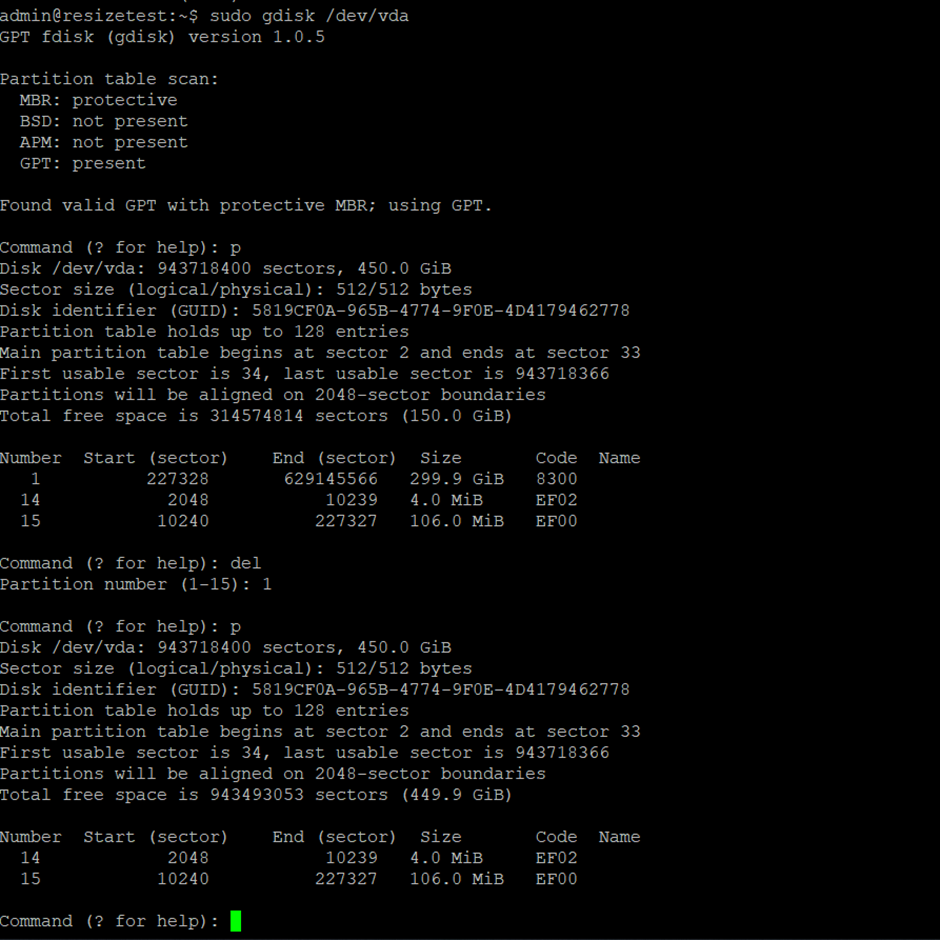
Sudo gdisk /dev/vda
then
p
to print the parttable
It will display the old disk size as we have not resized the disk yet
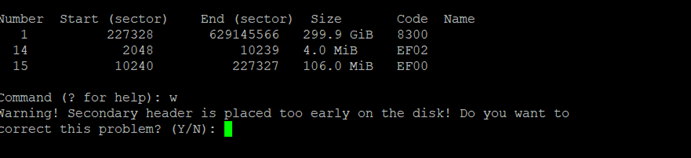
Press the w key to write changes.
We will receive a sector location error press Y to correct. This is expected.
Run again,
sudo gdisk /dev/vda
run P to examine the existing parttable before we change it
then run
del
1
To delete the partition from the partition table.
(note, this just eidts the partition table, not the actual data within those tables. If you do not do final comfirm and write of your changes the changes revert back to their existing settings.
Neext we will recreate partition #1 to the desired new size, again since we editing the partition table and not the data we do not risk losing data, however care must be taken to observice the right settings.
First, the new partition must be in the right order in the table (it usually is, but there is a sort command if needed.)
The sectors must be in the logical order an the file system should be correct.
Choose n to create new partition
1 for Partition 1
Press enter for First Sector and last sector
Enter 8300 for partition type
Enter P to display the changes. It should resemble below exactly

If you are satisfied, press W to write the changes. If you made a mistake DO NOT write the changes. Try again and once correct THEN W for changes.
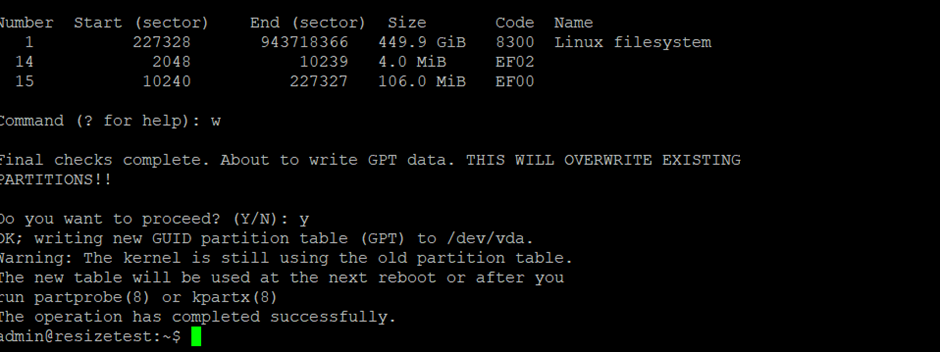
Note the message above. We have now successfully written the new partition table.
Next step is to actually resize our file system to fill the partition
Run
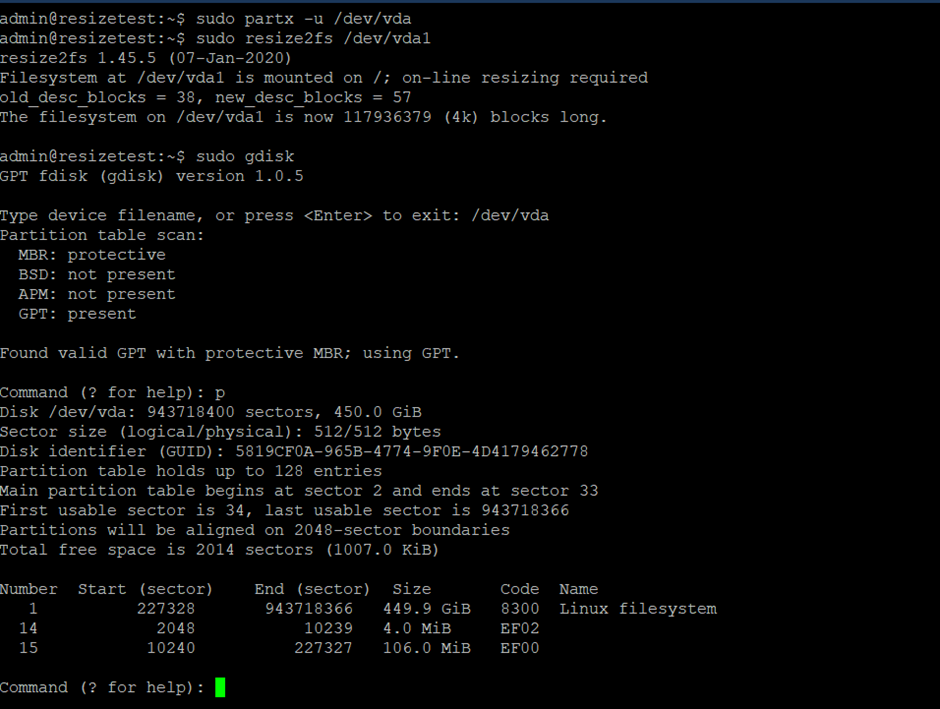
Sudo partx -u /dev/vda
Sudo resize2fs /dev/vda1
Your result should match the below
Run sudo gdisk and print to view the new result, it should reflect 450GB
Lets reboot for good measure to make sure everything is working. We are now done.