
Windows L2TP/IPsec VPN Client Configuration

For Windows 8, 10, 11

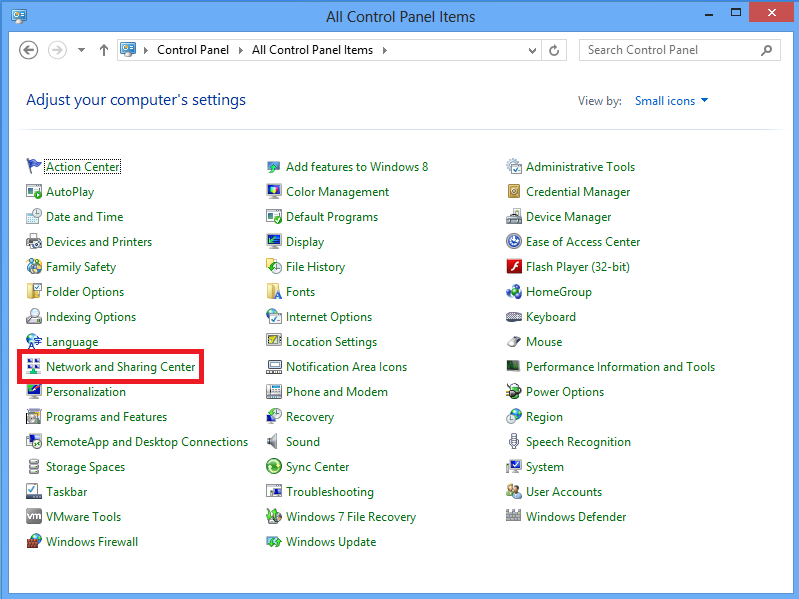
1. Open Control panel and select Network and Sharing center.

https://www.cisco.com/c/dam/en/us/support/docs/ip/layer-two-tunnel-protocol-l2tp/200340-Configure-L2TP-Over-IPsec-Between-Window-13.pngL2TP_1.png


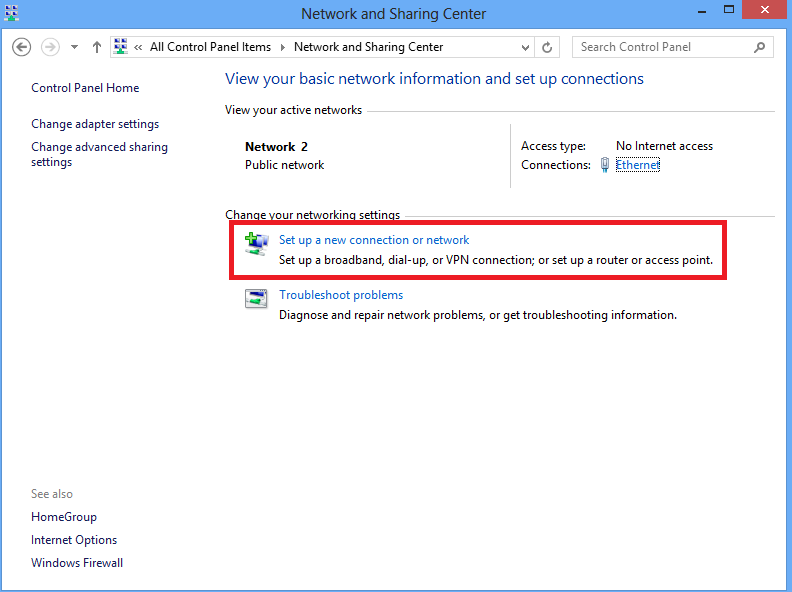
2. Choose Set up a new connection or network option.


https://www.cisco.com/c/dam/en/us/support/docs/ip/layer-two-tunnel-protocol-l2tp/200340-Configure-L2TP-Over-IPsec-Between-Window-14.pngimage11.png


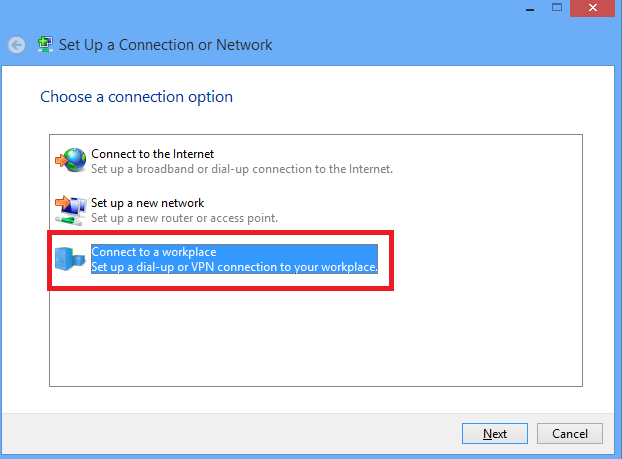
3. Choose Connect to a workplace option and click Next.

https://www.cisco.com/c/dam/en/us/support/docs/ip/layer-two-tunnel-protocol-l2tp/200340-Configure-L2TP-Over-IPsec-Between-Window-15.pngimage8.png


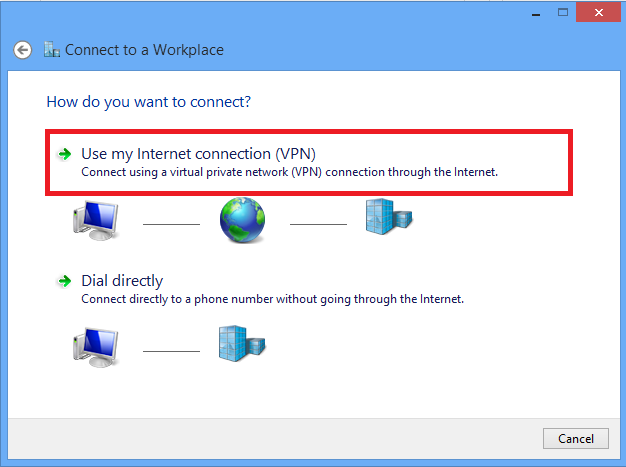
4. Click Use my Internet connection (VPN) option.


https://www.cisco.com/c/dam/en/us/support/docs/ip/layer-two-tunnel-protocol-l2tp/200340-Configure-L2TP-Over-IPsec-Between-Window-16.pngimage9.png


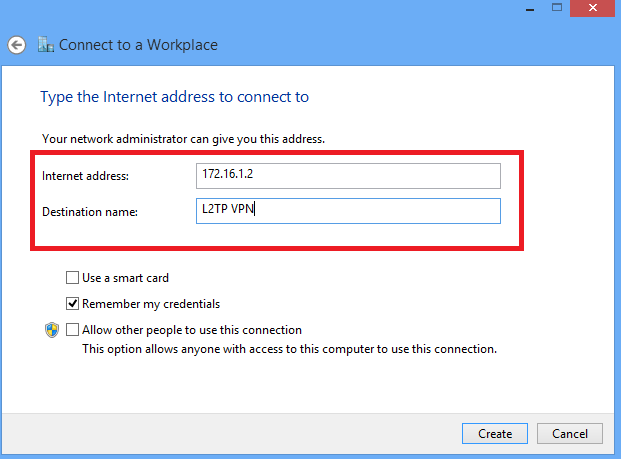
5. Enter IP address of ASA's WAN interface or FQDN and any name for VPN adapter which is locally significant and click Create.


https://www.cisco.com/c/dam/en/us/support/docs/ip/layer-two-tunnel-protocol-l2tp/200340-Configure-L2TP-Over-IPsec-Between-Window-17.pngimage6.png


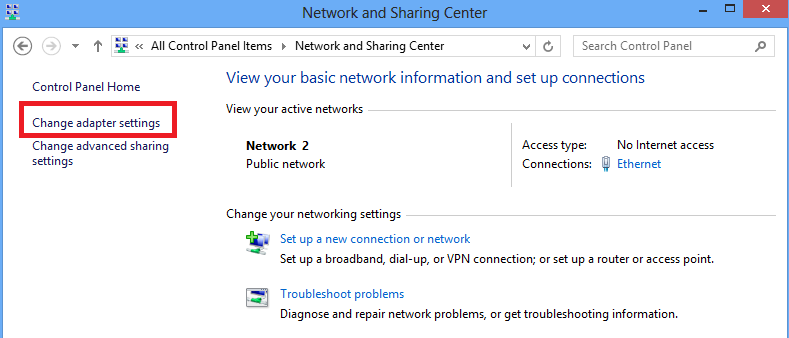
6. On Network and Sharing Center, choose Change adapter settings option on the left pane of the window.


https://www.cisco.com/c/dam/en/us/support/docs/ip/layer-two-tunnel-protocol-l2tp/200340-Configure-L2TP-Over-IPsec-Between-Window-18.pngimage5.png


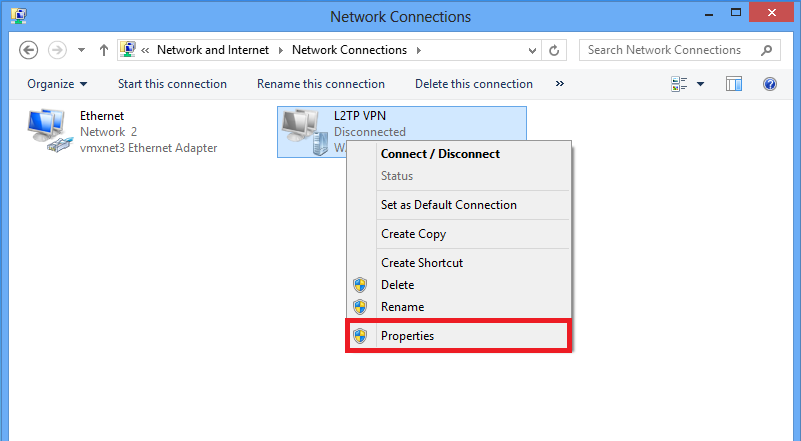
7. Right click the recently created adapterfor L2TP VPN and choose Properties.


https://www.cisco.com/c/dam/en/us/support/docs/ip/layer-two-tunnel-protocol-l2tp/200340-Configure-L2TP-Over-IPsec-Between-Window-19.pngimage13.png


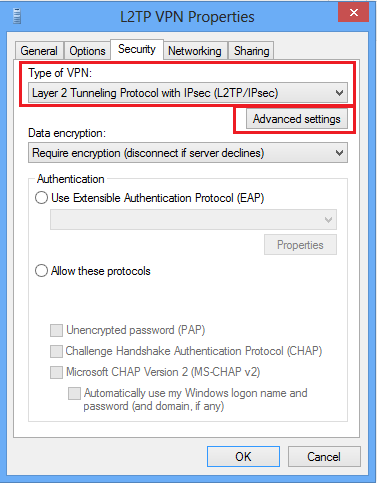
8. Navigate to Security tab, choose the Type of VPN as Layer 2 Tunneling Protocol with IPsec (L2TP/IPsec) and then click on Advanced settings.


https://www.cisco.com/c/dam/en/us/support/docs/ip/layer-two-tunnel-protocol-l2tp/200340-Configure-L2TP-Over-IPsec-Between-Window-20.pngimage2.png


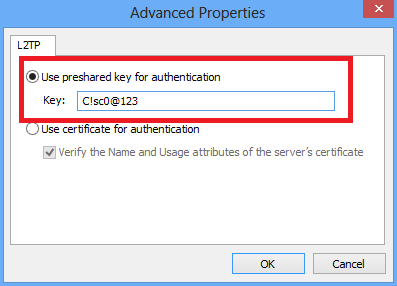
9. Enter the preshared key as the same mentioned in tunnel-group DefaultRAGroup and click OK. In this example, C!sc0@123 is used as the pre-shared key.


https://www.cisco.com/c/dam/en/us/support/docs/ip/layer-two-tunnel-protocol-l2tp/200340-Configure-L2TP-Over-IPsec-Between-Window-21.pngimage1.png


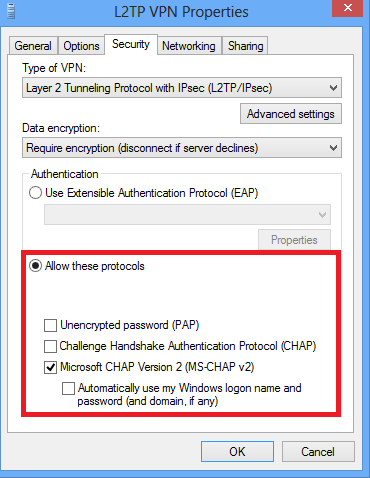
10. Choose the authentication method as Allow these protocols and ensure that only
"
Microsoft CHAP Version 2 (MS-CHAP v2) checkbox is checked and click OK.


https://www.cisco.com/c/dam/en/us/support/docs/ip/layer-two-tunnel-protocol-l2tp/200340-Configure-L2TP-Over-IPsec-Between-Window-22.pngimage3.png


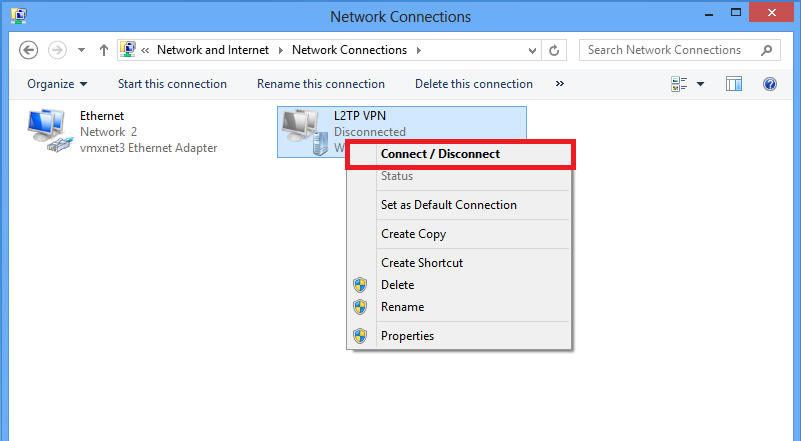
11. Under network connections, right click on L2TP VPN adapter and choose Connect/Disconnect.


https://www.cisco.com/c/dam/en/us/support/docs/ip/layer-two-tunnel-protocol-l2tp/200340-Configure-L2TP-Over-IPsec-Between-Window-23.pngimage10.png


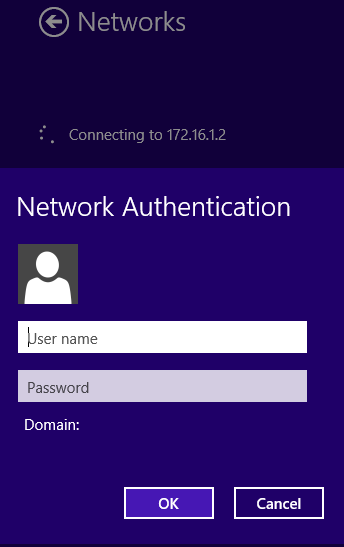
12. Networks icon will pop up and click Connect on L2TP VPN connection.


https://www.cisco.com/c/dam/en/us/support/docs/ip/layer-two-tunnel-protocol-l2tp/200340-Configure-L2TP-Over-IPsec-Between-Window-24.pngimage7.png


13. Enter the user credentials and click OK.


https://www.cisco.com/c/dam/en/us/support/docs/ip/layer-two-tunnel-protocol-l2tp/200340-Configure-L2TP-Over-IPsec-Between-Window-25.pngimage4.png