Windows L2TP/IPsec VPN Client Configuration
For Windows 8, 10, 11
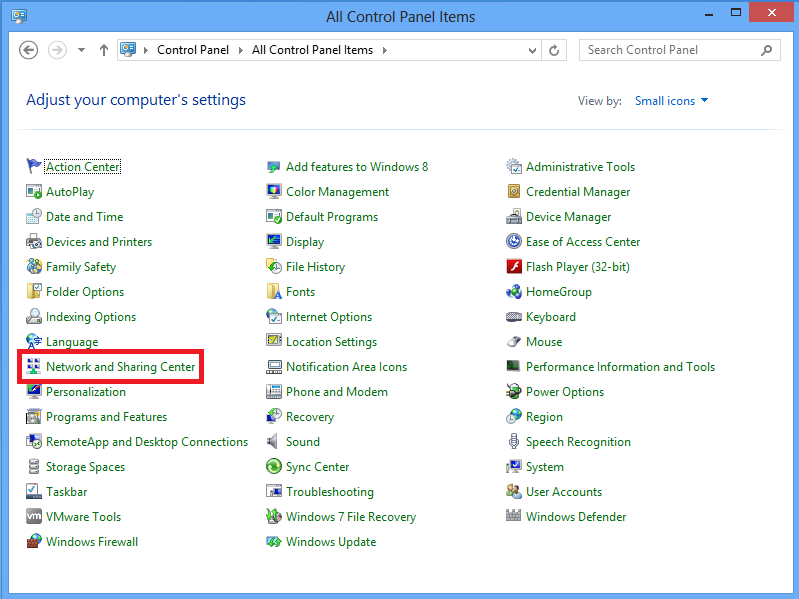
1. Open Control panel and select Network and Sharing center.
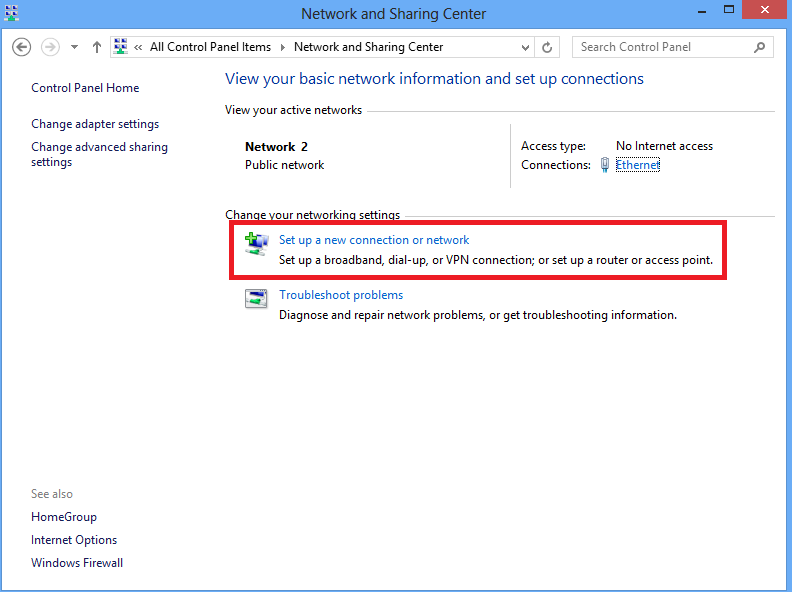
2. Choose Set up a new connection or network option.
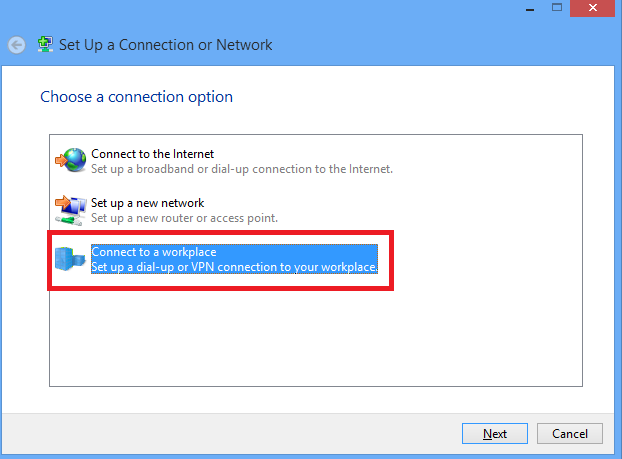
3. Choose Connect to a workplace option and click Next.
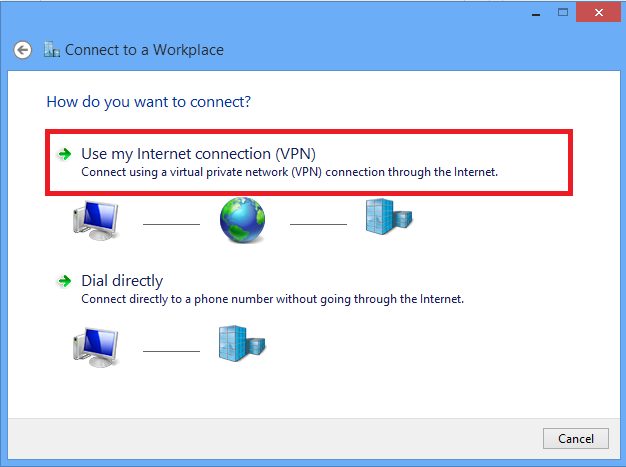
4. Click Use my Internet connection (VPN) option.
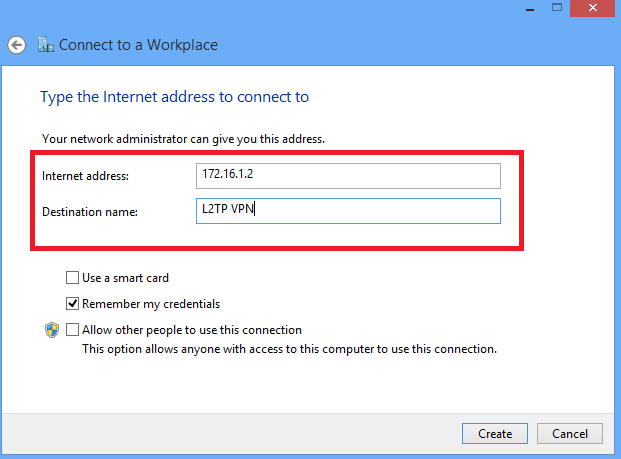
5. Enter IP address of ASA's WAN interface or FQDN and any name for VPN adapter which is locally significant and click Create.
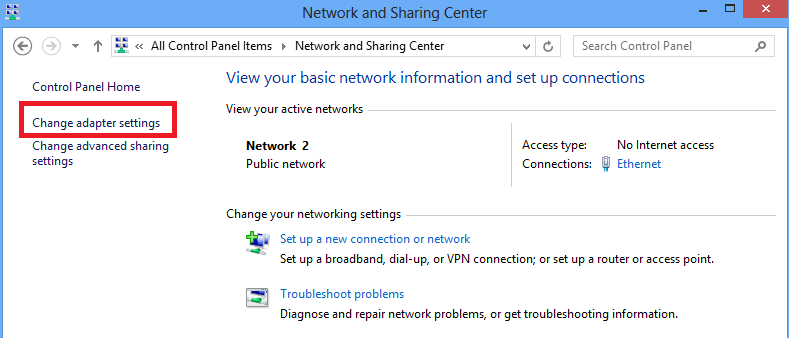
6. On Network and Sharing Center, choose Change adapter settings option on the left pane of the window.
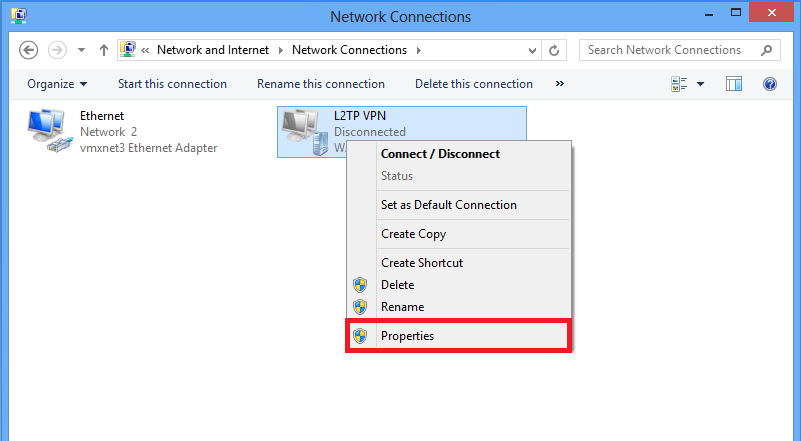
7. Right click the recently created adapterfor L2TP VPN and choose Properties.
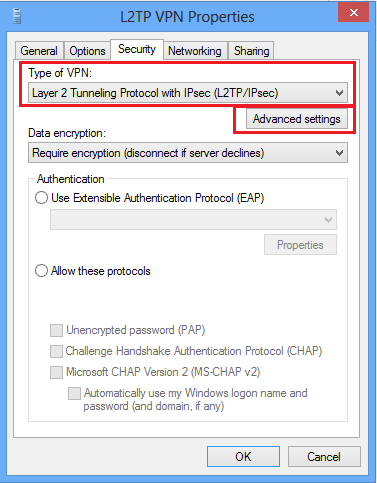
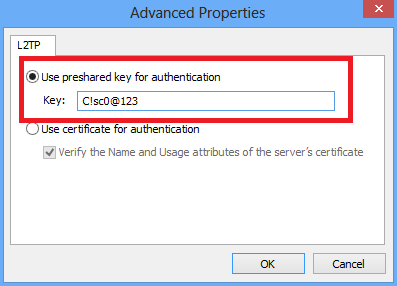
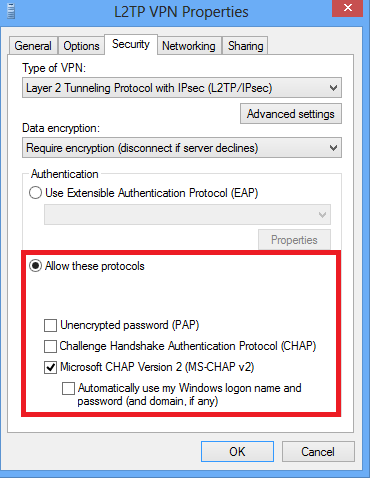
8. Navigate to Security tab, choose the Type of VPN as Layer 2 Tunneling Protocol with IPsec (L2TP/IPsec) and then click on Advanced settings.
9. Enter the preshared key as the same mentioned in tunnel-group DefaultRAGroup and click OK. In this example, C!sc0@123 is used as the pre-shared key.
10. Choose the authentication method as Allow these protocols and ensure that only
"Microsoft CHAP Version 2 (MS-CHAP v2) checkbox is checked and click OK.
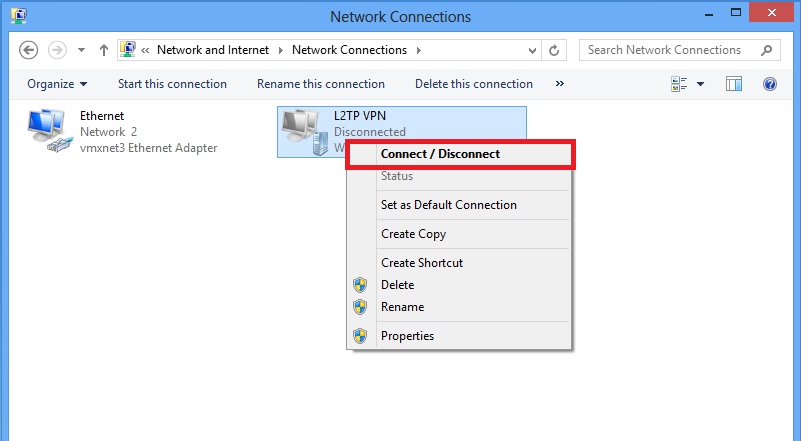
11. Under network connections, right click on L2TP VPN adapter and choose Connect/Disconnect.
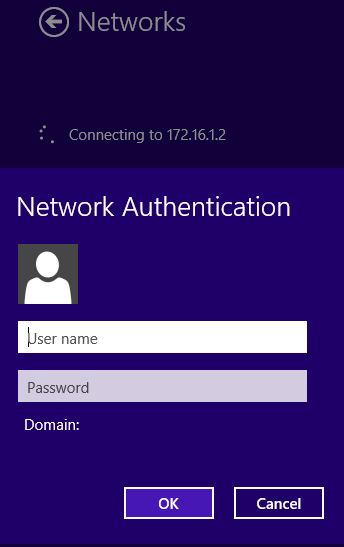
12. Networks icon will pop up and click Connect on L2TP VPN connection.
13. Enter the user credentials and click OK.

