Настройки электронной почты для RackCorp
RackCorp поддерживает автоматическое обнаружение почты. Это функция, встроенная в современные почтовые клиенты, которая позволяет программе электронной почты получать правильные настройки почты для пользователя, основываясь только на его адресе электронной почты и пароле.
Это работает для параметров электронной почты POP, IMAP и Exchange в RackCorp.
Если вы не хотите использовать автоматическое обнаружение, поддерживаются стандартные настройки электронной почты, включая дополнительное шифрование SSL и TLS между конечным пользователем и почтовыми серверами RackCorp.
Настройки электронной почты | POP/IMAP
Выберите сервер электронной почты POP или IMAP. Обычно рекомендуется IMAP.
Электронная почта POP загружает все электронные письма на ваше устройство, прежде чем их можно будет просмотреть, и при необходимости удаляет их с сервера.
- Плюсы: Полезно для архивирования, позволяет управлять почтовыми ящиками и почтой, например, с нулевым почтовым ящиком.
- Минусы: не идеально подходит для нескольких устройств, медленнее просматривает новые электронные письма.
IMAP сначала загружает заголовок электронной почты, чтобы можно было предварительно просмотреть отправителя, тему и дату, а вся почта хранится на сервере.
- Плюсы: легкий и хранит почту на сервере, идеально подходит для использования с несколькими устройствами и низкой пропускной способностью.
- Минусы: просмотр электронной почты в автономном режиме (офлайн) зависит от настроек и от того, была ли загружена вся почта.
Общие настройки:
|
Адрес эл. почты (Email) |
|
|
Логин (Username) |
|
|
Пароль (Password) |
your_password |
|
Сервер входящей почты (Incoming Server) |
mail.rackcorp.com |
|
Сервер исходящей почты (Outgoing Server) |
mail.rackcorp.com |
|
Тип исходящего сервера (Outgoing Server Type) |
SMTP |
|
Имя пользователя исходящего сервера (Outgoing Server Username) |
you@example.net (or tick ‘same as incoming’) if available |
|
Пароль исходящего сервера (Outgoing server password) |
your_password |
Выберите тип шифрования: Нет, SSL или TLS. TLS рекомендуется для обхода брандмауэра.
POP
|
POP со стандартным/небезопасным |
POP с SSL |
POP с TLS или STARTTLS |
|
Тип сервера: POP Входящий порт сервера: 110 Исходящий порт сервера: 25 Хранить почту на сервере: опционально |
Входящий порт сервера: 995 Исходящий порт сервера: 465 |
Входящий порт сервера: 143 Исходящий порт сервера: 25s |
IMAP
|
IMAP со стандартным/небезопасным |
IMAP с SSL |
IMAP с TLS или STARTTLS |
|
Тип сервера: IMAP Входящий порт сервера: 143 Исходящий порт сервера: 25 |
Входящий порт сервера: 993 Исходящий порт сервера: 465 |
Входящий порт сервера: 143 Исходящий порт сервера: 25 |
RackCorp global webmail for standard email is available at https://webmail.rackcorp.com
Email Settings | Exchange
To setup exchange email accounts in your client, the recommended way is to use auto discover with an exchange compatible mail client or use Outlook Web Access (OWA, Microsoft’s implementation of webmail, web based version of the Outlook email client for Exchange Email).
Supply your email address and password to the email client and it will perform the setup process. The setup process on most clients this will also setup Calendar, Tasks and Contacts. On Mobile devices, a device security policy may be applied by the setup process.
The address for OWA varies depending on the region and is available in your Outlook account information
https://mail.ex1.hostedurl.com/owa is the primary OWA system
mail.ex1.hostedurl.com is the primary RackCorp Exchange server if manual configuration is desired

Figure 1 Outlook Web Access (OWA) webmail on RackCorp
Email Client Setup | Microsoft Office Outlook
Outlook 2010/2013/2016
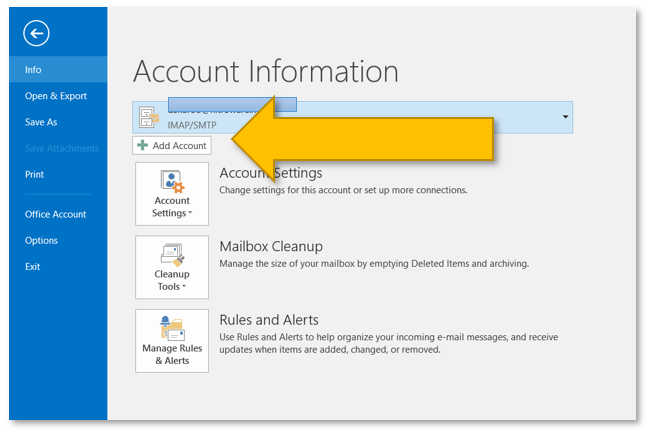
Figure 2 Microsoft Outlook account settings (File Menu)
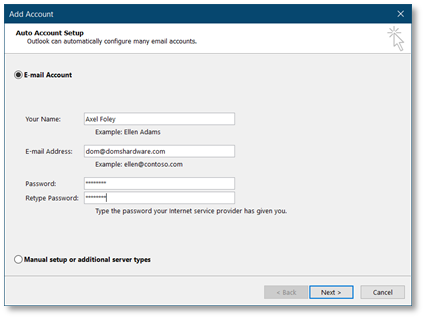
Figure 3 Microsoft Outlook Add Account - Auto Setup
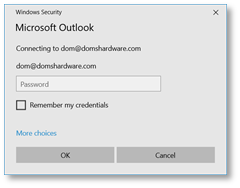
Figure 4 Enter your account password here if prompted during the auto setup process enter it. If you are also prompted to allow server settings, press allow
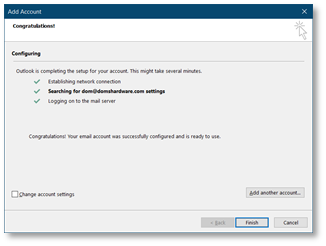
Figure 5 Microsoft Outlook auto account setup successful notfication
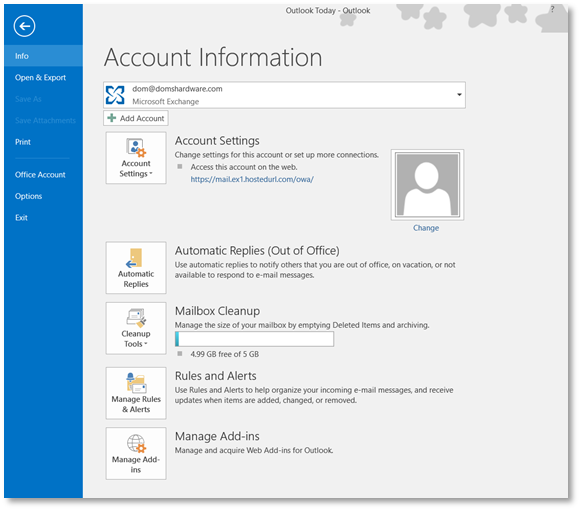
Figure 6 settings for your newly added account are available from the File menu in Microsoft Outlook and selecting the appropriate account from the drop down
Outlook 2019/Outlook 365
The setup screens for both these versions vary to other versions of versions of Outlook so verbal setup instructions will not be fully applicable.
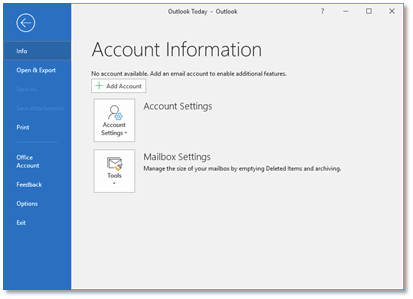
Figure 7 Microsoft Outlook account settings (File Menu)
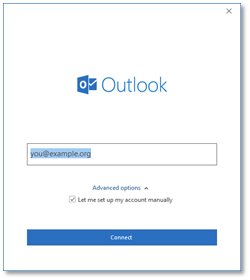
Figure 8 enter your email address in the Outlook welcome screen and tick manual setup
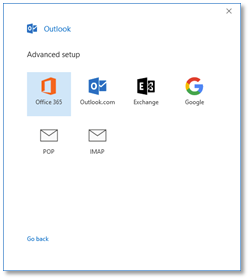
Figure 9 Choose from IMAP or POP email accounts. IMAP is recommended.
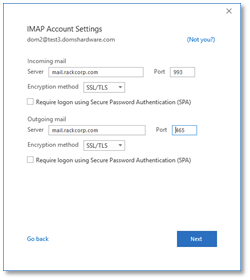
Figure 10 complete the email settings as illustrated, incoming and outgoing mail servers, encryption and ports
If you are using our Mongolian servers, please use mail.mn.rackcorp.com as the mail server.
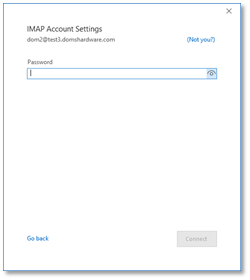
Figure 11 complete the password for your email account
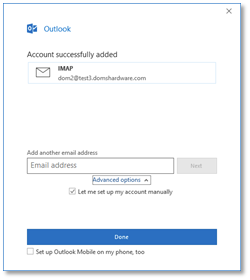
Figure 12 Outlook welcome process is a success message. There is a optional link selected by default that leads to a webpage describing how to install Outlook for mobile.
Email Client Setup | Windows 10 Mail
POP/IMAP manual setup
Auto discovery or manual settings can be used with Win10 Mail
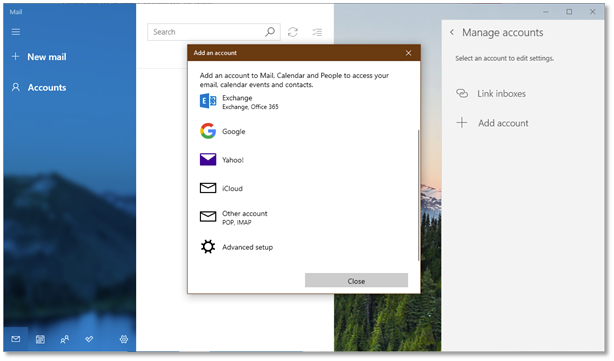
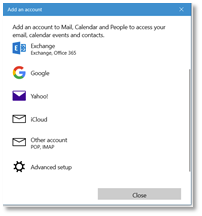
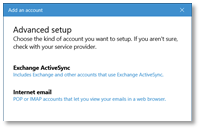
Figure 13 Windows 10 Mail setup – Click Accounts and then add account. Select Advanced setup
Figure 14 Windows 10 mail manual setup for RackCorp POP/IMAP email - choose advanced setup
If you are using our Mongolian servers, please use mail.mn.rackcorp.com as the mail server.
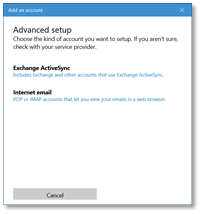
Figure 15 Windows 10 mail manual setup for RackCorp POP/IMAP email - choose Internet email
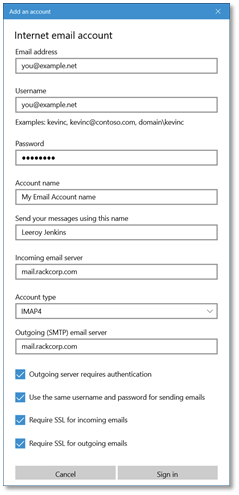
Figure 16 Windows 10 mail manual setup for RackCorp POP/IMAP email - fill in the details as illustrated, choose IMAP or POP
Exchange
At This time, there is an issue with the latest release of the email application for Windows 10, which prevents the ‘EXCHANGE’ option below from being chosen, ADVANCED SETUP must be chosen
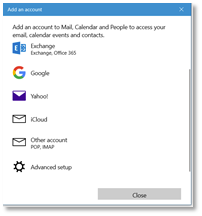
Figure 17 Windows 10 mail setup for RackCorp Hosted Exchange - choose advanced setup
Figure 18 Windows 10 mail setup for RackCorp Hosted Exchange - select Exchange ActiveSync
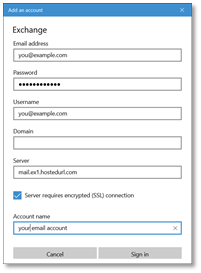
Figure 19 Windows 10 mail setup for RackCorp Hosted Exchange - fill in the details as illustrated. Domain is to be left blank.
Once you have completed THE ADD AN ACCOUNT form, Windows will prompt you about security policies for your computer. Select YES. Selecting YES may strength your windows security settings such as your password strength requirements You will then receive an ALL FINISHED success message.
Email Client Setup | Mozilla Thunderbird
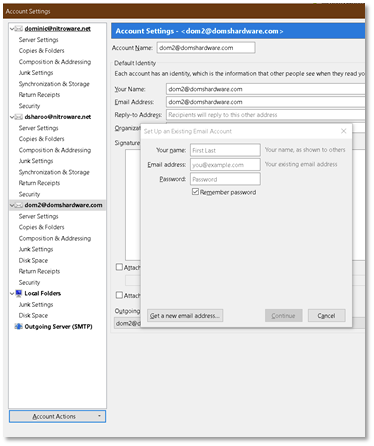
Figure 20 Mozilla Thunderbird setup, choose add mail account from the dropdown and fill in the details then press continue.
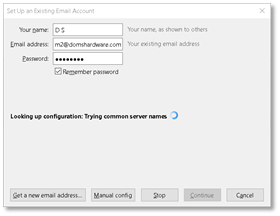
Figure 21 Mozilla Thunderbird email setup - choose manual Config now if you wish to define your own mail server settings
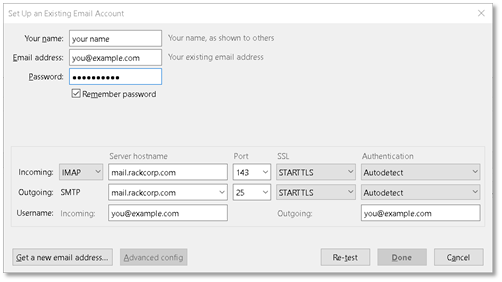
Figure 22 Mozilla Thunderbird setup - once the manual setup window appears, complete the mail server details, choosing IMAP or POP
If you are using our Mongolian servers, please use mail.mn.rackcorp.com as the mail server.
Email Client Setup | Apple Mac E-Mail
Exchange setup
POP3/IMAP manual setup
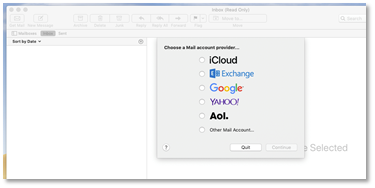
Figure 23 in Mac Mail accounts, select add other mail account
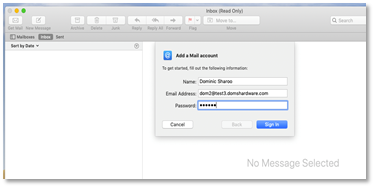
Figure 24 In the Mac Mail setup wizard, fill in your POP/IMAP account details
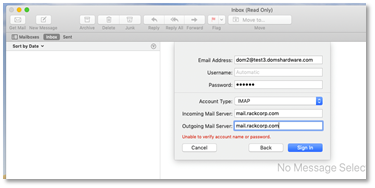
Figure 25 Mac Mail setup wizard will then request the server names. Fill in mail.rackcorp.com
If you are using our Mongolian servers, please use mail.mn.rackcorp.com as the mail server.
Email Client Setup | Android Phone and Tablets
For Android based phones, tablets, Chromebook and IoT devices, there are a number of options of e-mail clients. Some vendors supply their own developed email client however Google’s own GMAIL client is common across all legitimate android devices and we support this client.
POP/IMAP
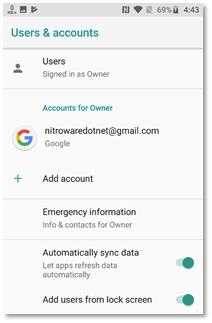
Figure 26 go to the add account function under 'Accounts' In Android settings, or Gmail
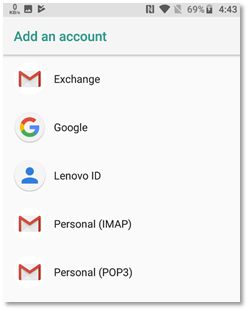
Figure 27 choose to add an IMAP account
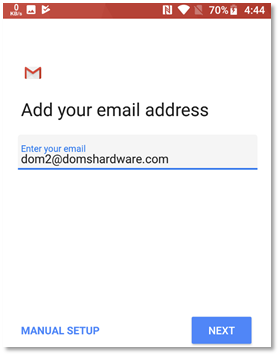
Figure 28 Once the email address is entered, Manual setup is unlocked. Choose MANUAL SETUP
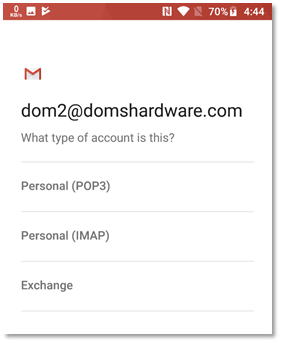
Figure 29 choose IMAP account. Optionally you may choose POP3
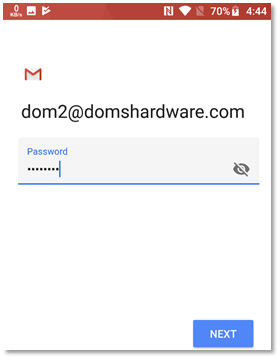
Figure 30 enter the password for the IMAP email account you wish to setup
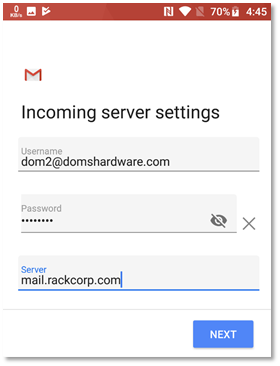
Figure 31 change the INCOMING mail server to mail.rackcorp.com
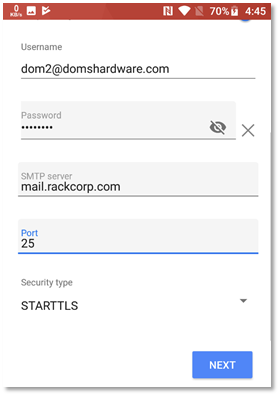
Figure 32 change the OUTGOING mail server to mail.rackcorp.com. Change the port to 25 and security to STARTTLS
If you are using our Mongolian servers, please use mail.mn.rackcorp.com as the mail server.
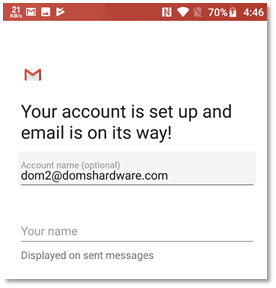
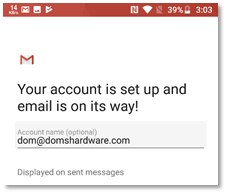
Figure 33 successful account configuration will result in a success message
Exchange
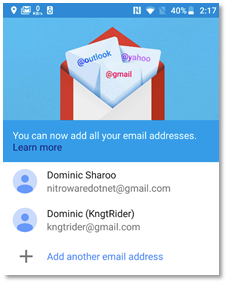
Figure 34 within GMAIL, choose add account or add another email address
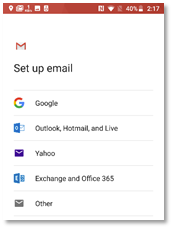
Figure 35 GMAIL will present a list of account types. Choose EXCHANGE
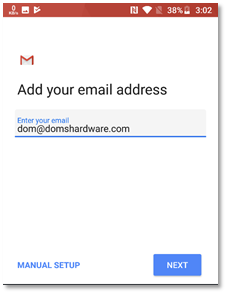
.Figure 36 enter the email address for your EXCHANGE account at the prompt to begin the setup process
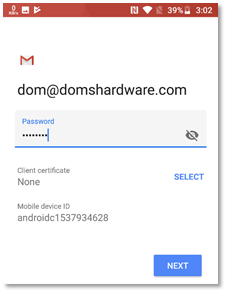
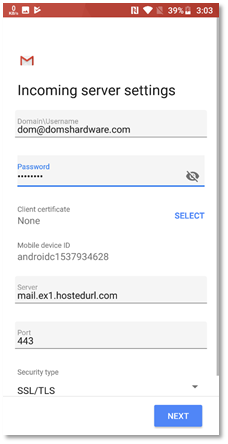
Figure 37 enter the password for your exchange account when prompted
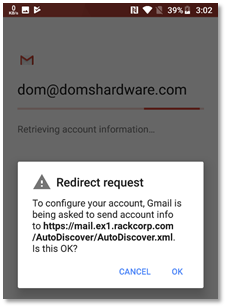
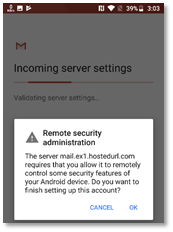
Figure 38 several prompts will be made during the exchange setup process. Agree to these by pressing OK
Figure 39 once your password is accepted, a further page will display a summary of your account settings. simply press NEXT
Figure 40 several prompts will be made during the exchange setup process. Agree to these by pressing OK.
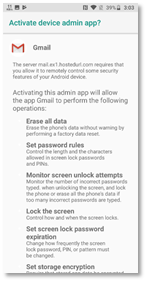
Figure 41 To add exchange accounts to a mobile device, the exchange server requires mobile device management rules as listed to be applied to your device.
Please read the above screen carefully. Changes to the security settings of your device will be made automatically and are required to add exchange mail to your device.
Figure 42 when the Gmail exchange setup process is complete the success message is displayed
Email Client Setup | Apple iPhone and iPad
POP/IMAP manual setup
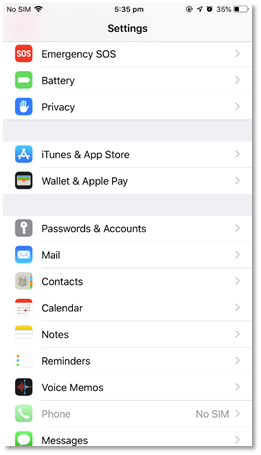
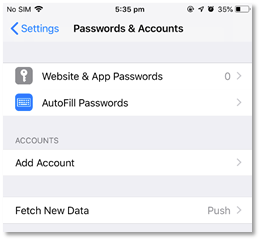
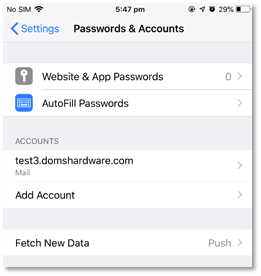
Figure 44 in the Settings -> Passwords & accounts page, hit Add Account. Fetch New Data should be Push
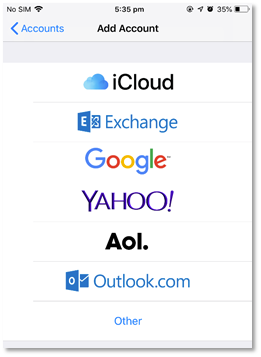
Figure 45 we are manually setting up an IMAP or POP account so choose Other
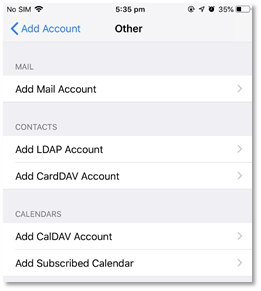
Figure 46 Under Other - Add Mail Account
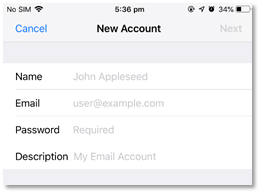
Figure 47 Fill in your email account details as requested
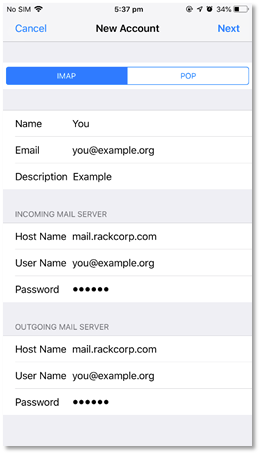
Figure 48 fill in the email account and server details as illustrated
If you are using our Mongolian servers, please use mail.mn.rackcorp.com as the mail server.
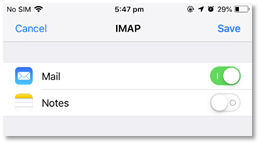
Figure 49 once your account details are saved and tested, you can choose what data to sync to the mail server, leave the default setting
Figure 50 on success your email account is now added to the account list in iOS
Exchange
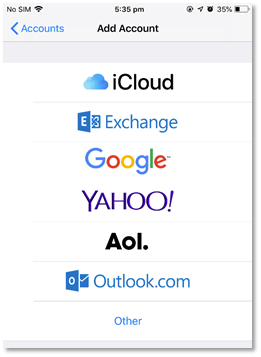
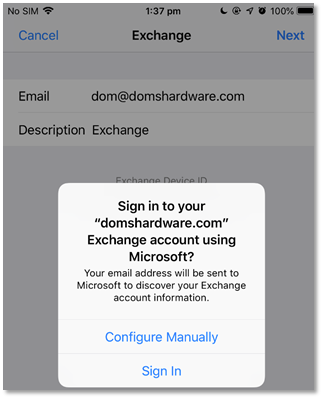
Figure 51 we are setting up an EXCHANGE account
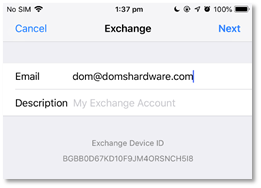
Figure 52 enter your email address for your exchange account
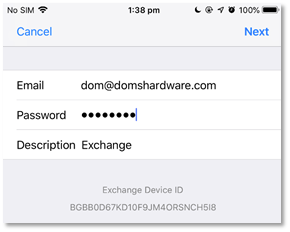
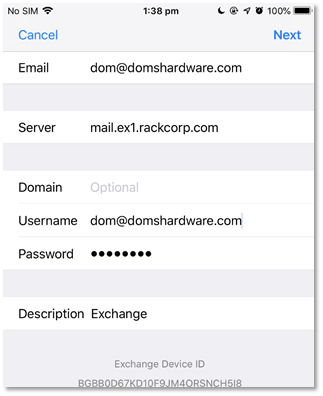
Figure 53 enter your password and create an account description
Figure 53 enter your password and create an account description
Figure 55 fill in your account details as follows
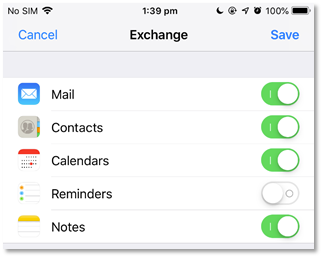
Figure 56 once your account details are confirmed and verified, you will receive a sync options screen. Choose here what options you want to sync to your device. Syncing contacts for example will overwrite your existing contacts and upload existing contacts

