Install OPNsense Firewall
OPNsense 20.x setup workflow for RackCorp Hybrid cloud
Summary:
Setting up OPNsense is easy if one has direct access bare metal, or has a desktop virtualisation where one can define internal NICs/networks, which can be used for the LAN side management.
However, since we are setting up in a hybrid public/private cloud, without a management terminal (VM) setup on the same subnet as the LAN network, we will not be able to manage and configure the OPNsense since the locked down WAN interface is the one exposed to the outside world. Additionally, limited configuration is provided through its’s terminal shell.
We want to have some management ports (properly secured) exposed to the Internet.
For our hybrid cloud, we shall swap the public and private interfaces in OPNsense
This is the reverse of the expected setup flow. We do this because the LAN interface has a preset ‘allow all’ rule which lets us login to its management portal.
This will allow us to easily configure the system remotely via web browser and then we will change the settings back to the Public IP being on the WAN interface and private IP on the LAN interfaces.
The general steps to get OPNsense 20 running on RackCorp Hybrid are as follows:
Install ISO
Get access to Web GUI
Make firewall rule on WAN interface for remote management
Reassign/swap the LAN/WAN interfaces
Rekey in the correct IP address for the LAN/WAN interfaces
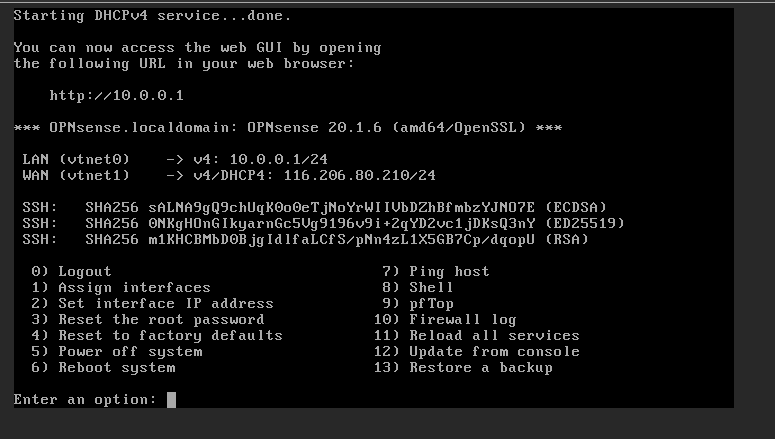
OPNsense assigns its Interfaces to NICs in the order they are assigned to in the RackCorp Portal, starting with LAN interface.
So let’s ‘swap’ the interfaces so we can login to the management webpage:
1. Start off with the following configuration for the RackCorp Portal and OPNsense in your RackCorp VM
| RackCorp vNIC ID | RackCorp vNIC Label | IP | VLAN | OPNsense Interface |
| NIC 1 | Public | 116.206.80.210 /27 | <your assigned VLAN> Public VLAN1 for Demo |
LAN (vtnet0) |
| NIC 2 | Private | 10.0.0.1 /24 | <your assigned VLAN> Public VLAN1 for Demo | WAN (vtnet1) |
Rackcorp portal will display green lights when the configuration is correct.
Setup your RackCorp VM with the networking from the above table.
- Don’t forget to add the VLANs
- For demonstration, we have left the default vNIC labels. If the vNIC labels are confusing you could define them based on the interface, e.g. Private or Public combined with the end of the vNIC MAC address e.g. 33 or 34.