Install OPNsense Firewall in the cloud
OPNsense 20.x setup workflow for RackCorp Hybrid cloud
Summary:
Setting up OPNsense is easy if one has direct access bare metal, or has a desktop virtualisation where one can define internal NICs/networks, which can be used for the LAN side management.
However, since we are setting up in a hybrid public/private cloud, without a management terminal (VM) setup on the same subnet as the LAN network, we will not be able to manage and configure the OPNsense since the locked down WAN interface is the one exposed to the outside world. Additionally, limited configuration is provided through its’s terminal shell.
We want to have some management ports (properly secured) exposed to the Internet.
For our hybrid cloud, we shall swap the public and private interfaces in OPNsense
This is the reverse of the expected setup flow. We do this because the LAN interface has a preset ‘allow all’ rule which lets us login to its management portal.
This will allow us to easily configure the system remotely via web browser and then we will change the settings back to the Public IP being on the WAN interface and private IP on the LAN interfaces.
The general steps to get OPNsense 20 running on RackCorp Hybrid are as follows:
Install ISO
Get access to Web GUI
Make firewall rule on WAN interface for remote management
Reassign/swap the LAN/WAN interfaces
Rekey in the correct IP address for the LAN/WAN interfaces
The WAN IP included in this guide is for example only. Please replace it with the one we have provided you
1. Install ISO
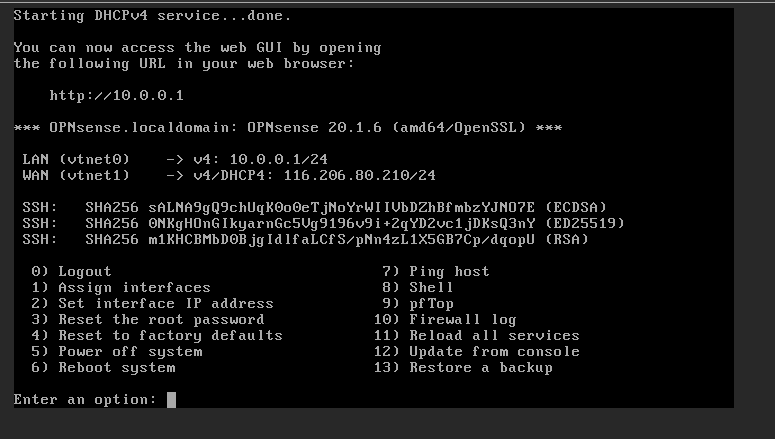
OPNsense assigns its Interfaces to NICs in the order they are assigned to in the RackCorp Portal, starting with LAN interface.
So let’s ‘swap’ the interfaces so we can login to the management webpage:
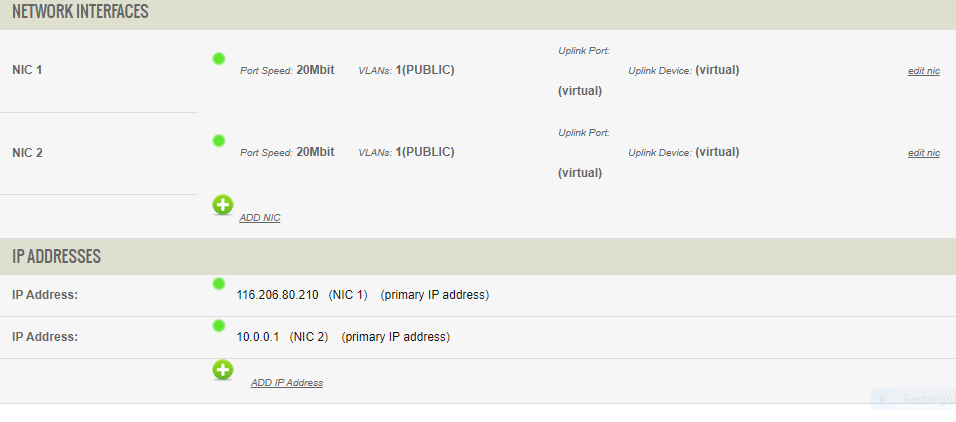
1. Start off with the following configuration for the RackCorp Portal and OPNsense in your RackCorp VM
| RackCorp vNIC ID | RackCorp vNIC Label | IP | VLAN | OPNsense Interface |
| NIC 1 | Public | 116.206.80.210 /27 | <your assigned VLAN> Public VLAN1 for Demo |
LAN (vtnet0) |
| NIC 2 | Private | 10.0.0.1 /24 | <your assigned VLAN> Public VLAN1 for Demo | WAN (vtnet1) |
Rackcorp portal will display green lights when the configuration is correct.
Setup your RackCorp VM with the networking from the above table.
- Don’t forget to add the VLANs
- For demonstration, we have left the default vNIC labels. If the vNIC labels are confusing you could define them based on the interface, e.g. Private or Public combined with the end of the vNIC MAC address e.g. 33 or 34.
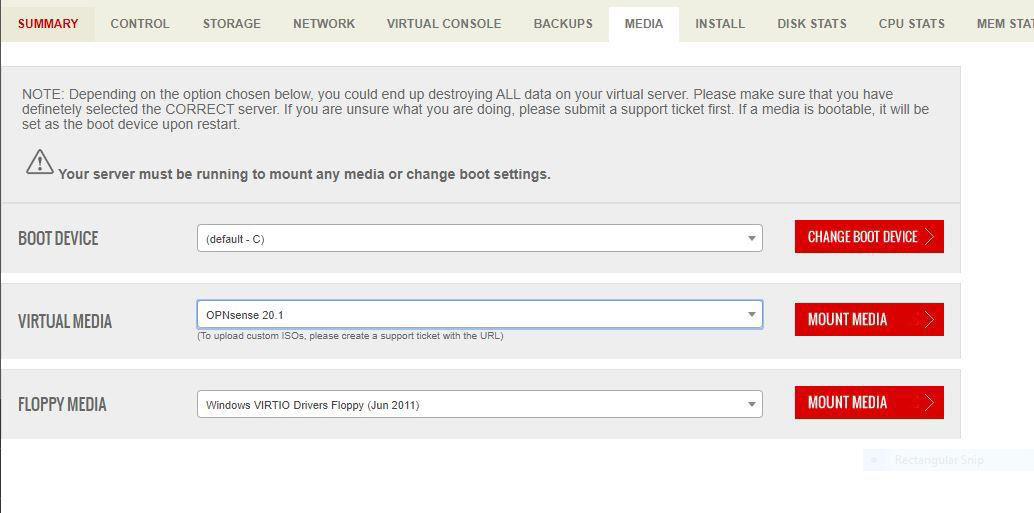
2. Follow the boot and installation instructions for the OPNsense 20.x using the ISO image file.
2.1 Mount the OPNsense Installer ISO in RackCorp and then boot the VM.
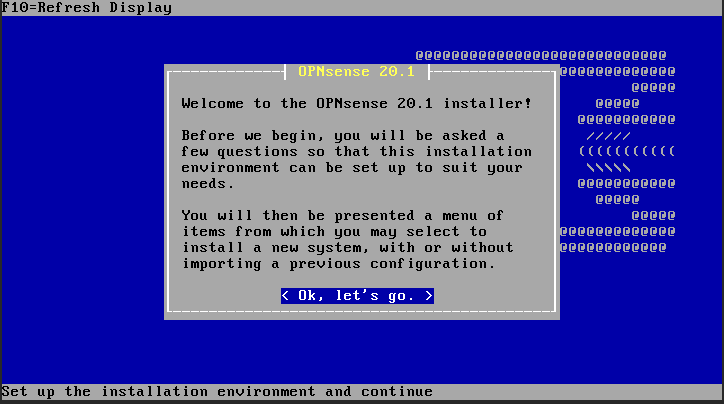
2.2 A live environment is booted with optional installation.
Do not run interface assignment during boot if you are going to install to HD.
2.3 Once booted, install the system to disk using the following
Login: installer password: opnsense
Follow the guided instructions to install to HDD. The defaults are fine for a single disk install. Once complete, follow the prompt to reboot the OPNsense install and EJECT the ISO from the RackCorp portal.
2. Get access to Web GUI
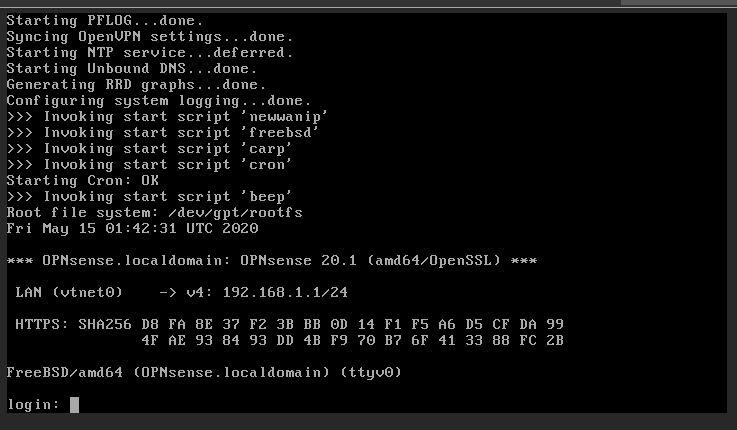
3. Opnsense has a built in wizard in the console menu that aids the user to setup their LAN NIC, WAN NIC, any tertiary NIC such as a DMZ or management NIC as well as IPv4/6 addressing and DHCP. Your Opnsense will have booted to this menu after install.
3.1 SET INTERFACE IP for WAN
Select NONE, this will clear the interface and let us re-assign.
3.2 SET INTERFACE IP for LAN
Select 116.206.80.210/27 as per table.
Since this example uses a 27 bit subnet, our gateway is .193 and our maximum host is .223.
For DNS use RackCorp NS1 110.232.116.249 or Google DNS 8.8.8.8
| Interface | LAN |
| DHCP | No |
| New LAN IP | 116.206.80.210 |
| Subnet | 27 |
| Gateway | 116.206.80.193 |
| Gateway as name server | No |
| IPv4 Name server | 8.8.88 |
| IPv6 LAN Interface via WAN Tracking: | No |
| IPv6 LAN Interface via DHCP: | No |
| IPv6 Address: | <enter> for none |
| LAN DHCP Server: | n |
| HTTP fallback for web GUI | n |
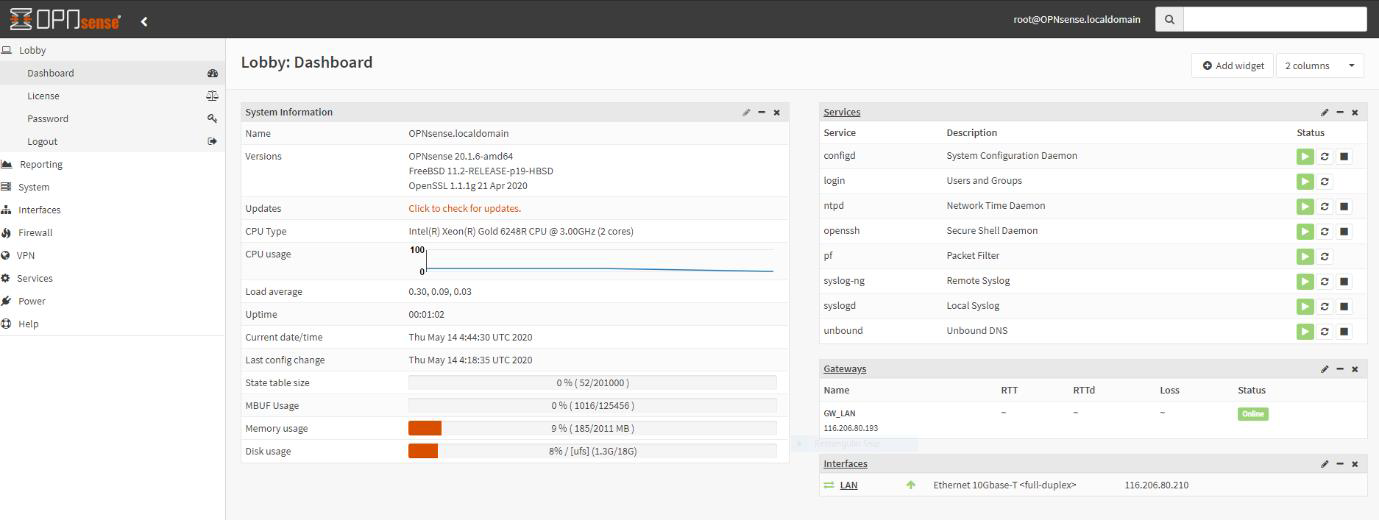
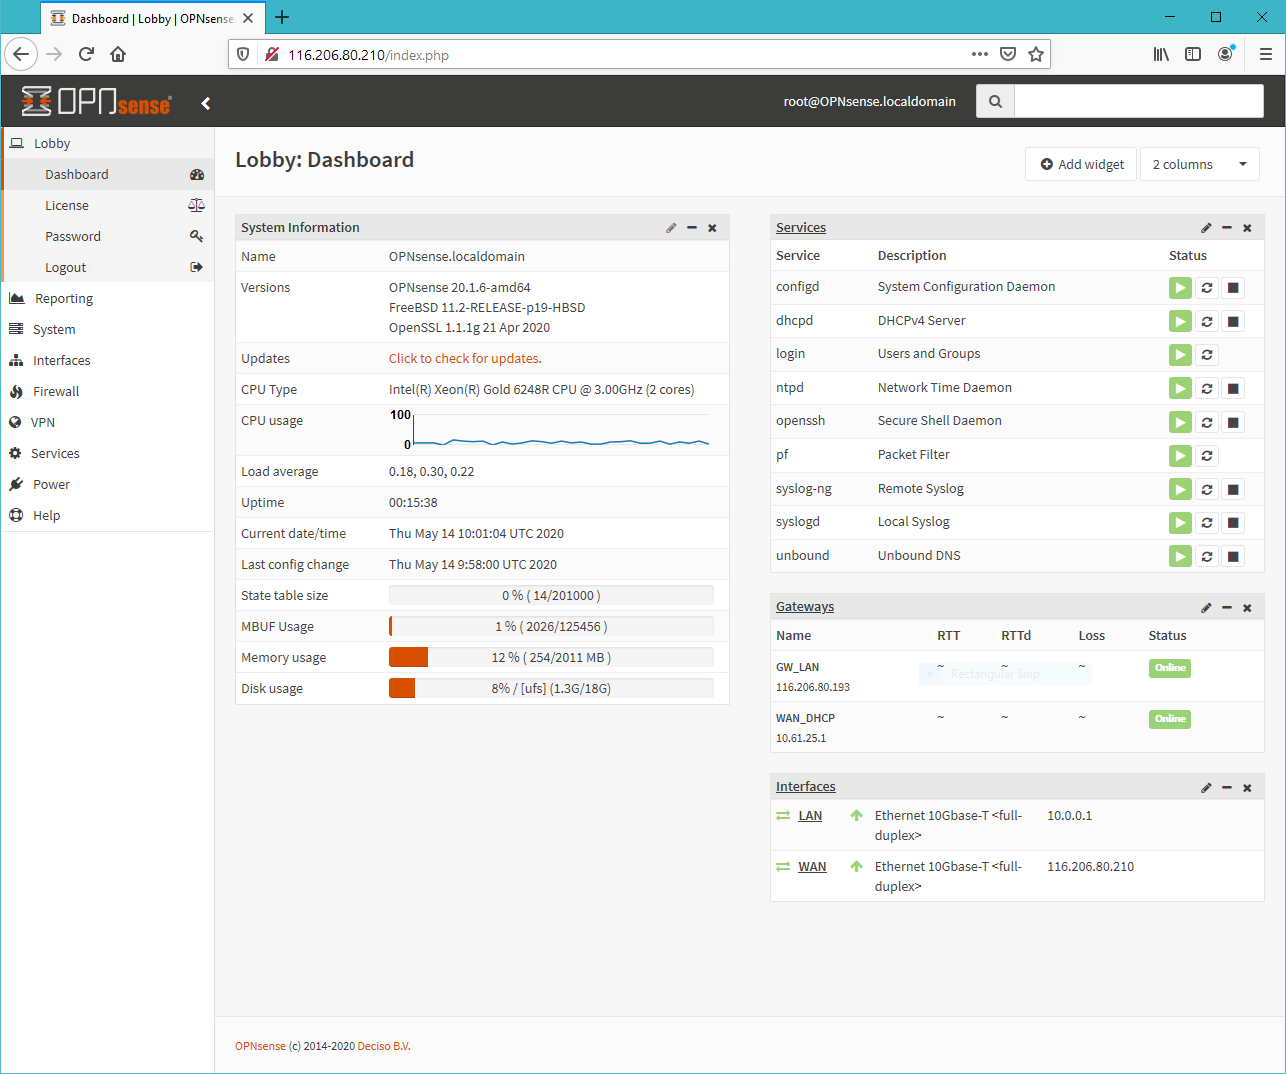
4. Once you have keyed in the LAN IP address, you should be able to access it via web browser. There will be an introductory setup wizard but be sure to skip the WAN setup page. Login to OPNsense web page. Click logo top left to skip configuration wizard.
Once we have logged into the OPNsense management page, this is verification that we can access the system
3. Make firewall rule on WAN interface for remote management
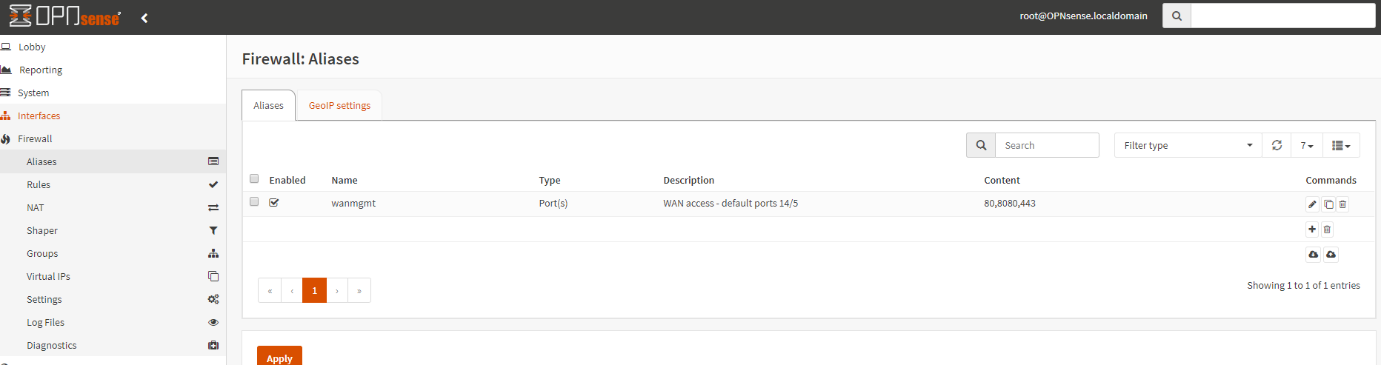
5. Add an alias to define management ports. Firewall-> Aliases. We use ports 80, 443, 8080 in this example.
[Save]. [Apply]
6. Add WAN port forward rule to Firewall -> Rules -> WAN.
| Protocol: | TCP |
| Source Port: | Any |
| Destination port range Start: | <Your alias name> Scroll UP in the list to find it. |
| Destination port range End: | <Your alias name> Scroll UP in the list to find it. |
| Log Packets: | Enabled |
[Save]. [Apply].

4. Reassign/swap the LAN/WAN interfaces
7. Interfaces-> Assignments. Compare the settings here versus Rackcorp portal
Where are we now: a LAN Interface with public IP set in OPNsense and WAN interface with no WAN IP set.
Since our Port Forward that will allow us to access management interface externally is now defined, we can swap the interfaces. You need to swap both the interfaces in OPNsense portal.
7.1 In OPNense portal, (Interfaces->Assignments) Swap so that
(LAN) -> VTNET1 RackCorp NIC 2
(WAN) -> VTNET0 RackCorp NIC 1
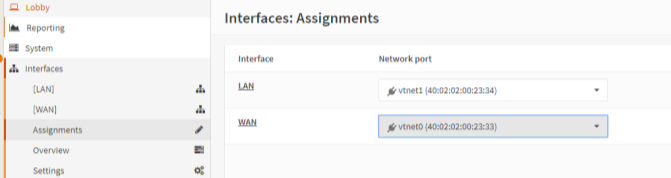
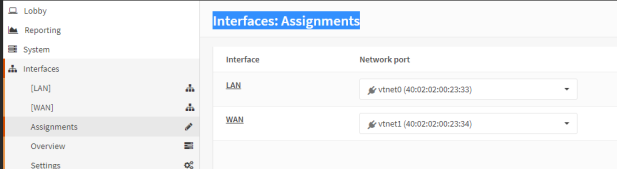
[SAVE]
5. Rekey in the correct IP address for the LAN/WAN interfaces
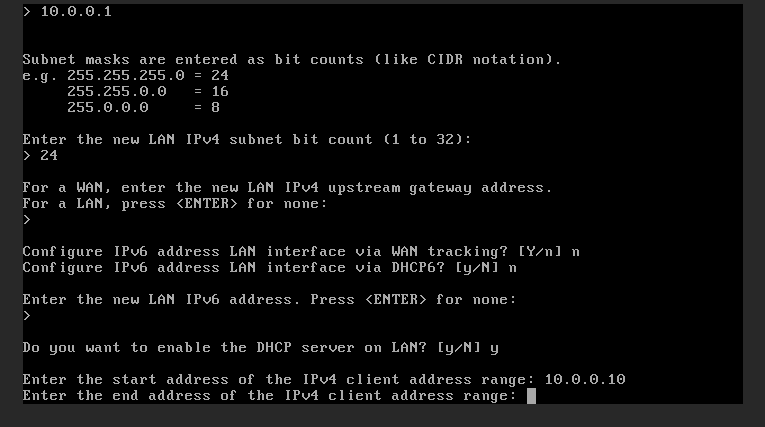
8. Once you have swapped, OPNsense might forget the IP subnets and we need to re-key them into the console.
Re-key in the IP/subnets using option 2. Clear them if necessary with <ENTER NONE>
| Interface | LAN |
| Configure via DHCP | No |
| New LAN IP | 10.0.0.1 |
| Subnet | 24 |
| Gateway | <enter> for none |
| IPv6 LAN Interface via WAN Tracking: | N |
| IPv6 LAN Interface via DHCP6: | N |
| IPv6 Address: | <enter for none |
| LAN DHCP Server: | Y |
| SDHCP End Address: | 10.0.0.20 |
| Revert to HTTP as web GUI protocol | N |
| Interface | WAN |
| Configure via DHCP | N |
| New WAN IP | 116.206.80.210 |
| Subnet | 27 |
| Gateway | 116.206.0.193 |
| Gateway as name server | no |
| IPv4 Name server | 8.8.8.8 |
| IPv6 WAN Interface via DHCP6: | N |
| IPv6 Address: | <enter> for none |
| Revert to HTTP as web GUI protocol | N |
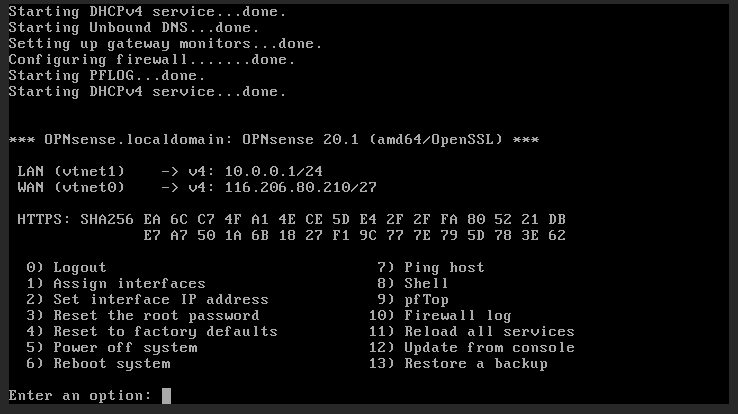
9. Once both LAN and WAN have been rekeyed, you should be able to log in to the OPNsense management portal via its WAN address and RackCorp vNIC status lights turn green.
10. Follow our additional tasks for further configuration as required.
11. If you have problems with this procedure, select (4) Reset Factory Settings in the console menu. The OPNsense will reset itself, then shutdown. Restart the VM from RackCorp and try again. 11) Reload all services can also help
ADDITIONAL TASKS
Once your basic setup is running, it can be further configured to suit your requirements.
Consult your security policy on how to handle such appliance management.
Things to consider can be, of which many are industry best practice
- Considering adding a management network or 1 or more DMZ networks to the firewall for added functionality
- Use VPN functionality for management login instead of HTTP/S ports.
- Use VPN functionality for remote workers to be able to access enterprise content.
- If HTTP/S ports are desired for management via WAN/Internet, consider changing the port numbers and or whitelisting the OPNsense IP/URL to particular authorised management systems.
- Configure and test SSH access if necessary, bound by whitelisting, management interface or VPN tunnel.
- Install additional plugins, such as Wireguard VPN or other utilities via the plugins page to enhance the functionality of the firewall.
No comments to display
No comments to display