Apple iPhone and iPad
POP/IMAP manual setup

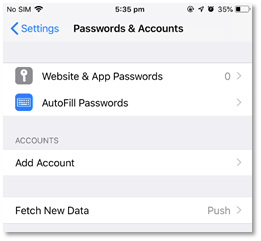
Figure 44 in the Settings -> Passwords & accounts page, hit Add Account. Fetch New Data should be Push
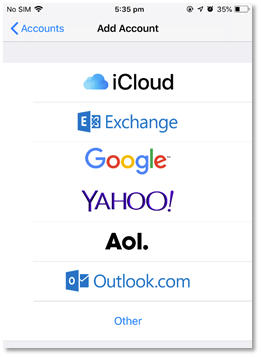
Figure 45 we are manually setting up an IMAP or POP account so choose Other
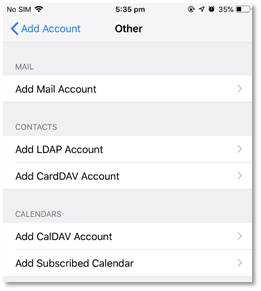
Figure 46 Under Other - Add Mail Account
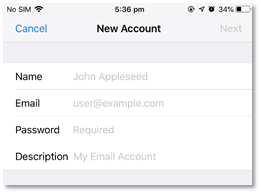
Figure 47 Fill in your email account details as requested
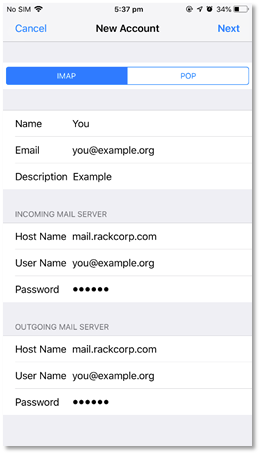
Figure 48 fill in the email account and server details as illustrated
If you are using our Mongolian servers, please use mail.mn.rackcorp.com as the mail server.
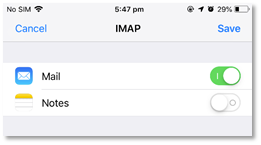
Figure 49 once your account details are saved and tested, you can choose what data to sync to the mail server, leave the default setting

Figure 50 on success your email account is now added to the account list in iOS
Exchange

Figure 51 we are setting up an EXCHANGE account
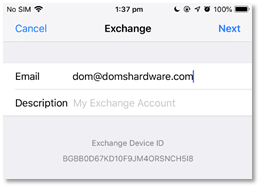
Figure 52 enter your email address for your exchange account
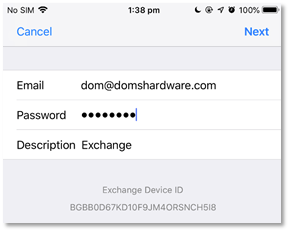
Figure 53 enter your password and create an account description
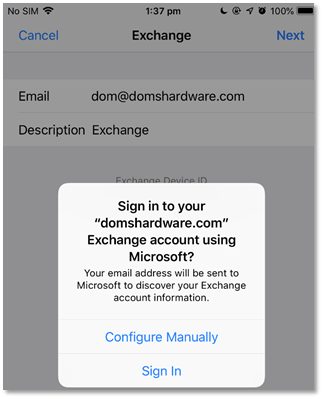
Figure 53 enter your password and create an account description

Figure 55 fill in your account details as follows
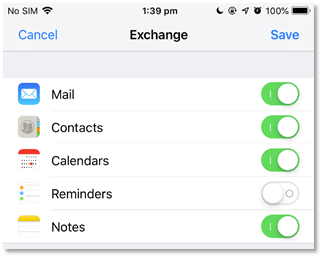
Figure 56 once your account details are confirmed and verified, you will receive a sync options screen. Choose here what options you want to sync to your device. Syncing contacts for example will overwrite your existing contacts and upload existing contacts
No comments to display
No comments to display