Enabling RackCorp Object Storage with Veeam Backup 12
For purpose of this guide, we used the latest Veeam patch at time of writing, 12.2, however the same functionality is exposed on 12.x
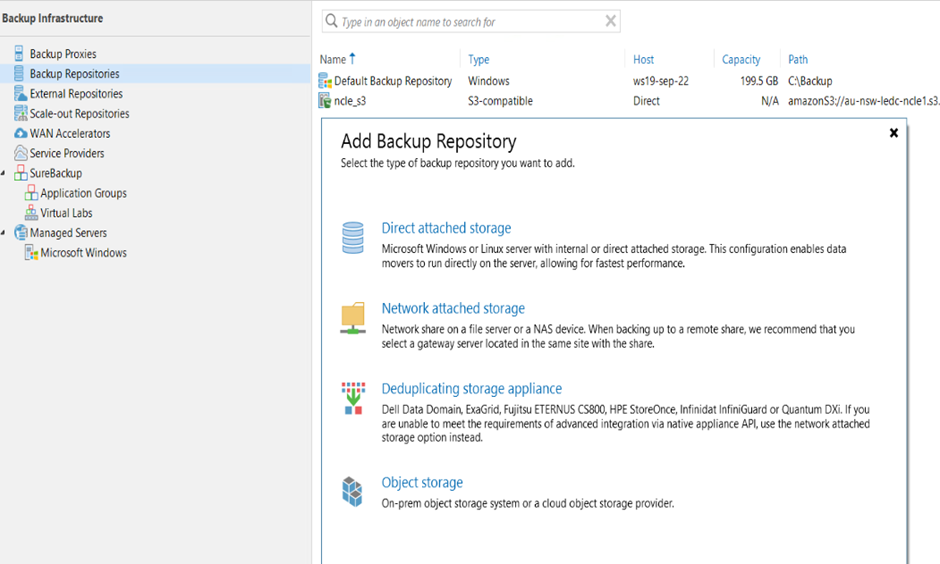
Create a Object Storage for direct backups
- Add the backup repository to Veeam; select OBJECT STORAGE
2. Select S3 COMAPTIBLE as we will be using the S3 API to connect to the object store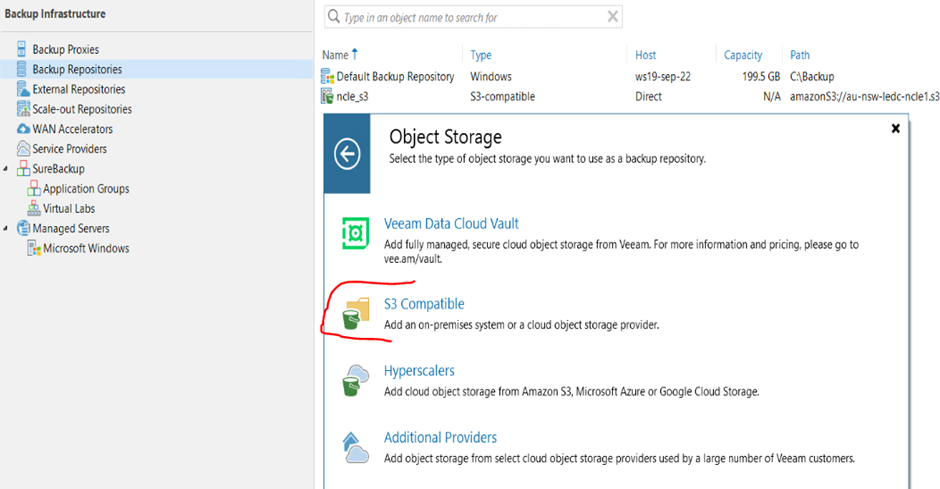
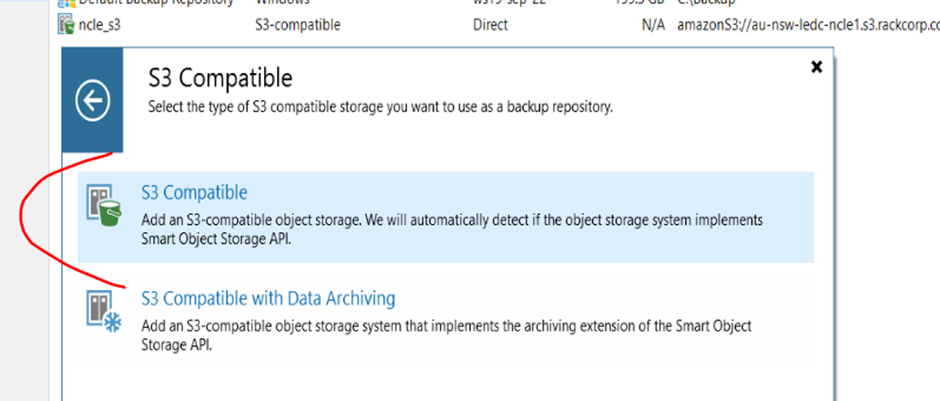
3. Choose S3 Compatible
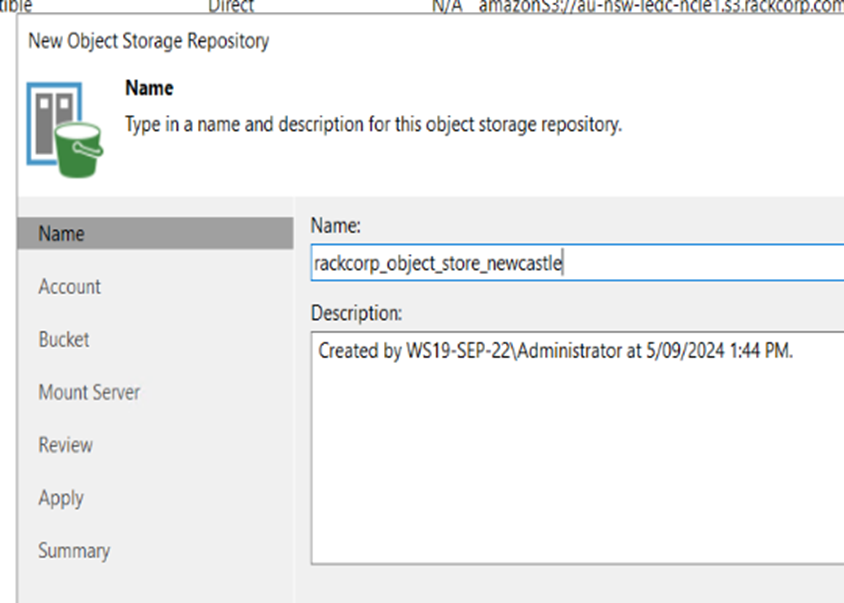
4. Give the object store connection a unique name, For example in this excerise we are connecting to the RackCorp Object store in Newcastle
5. Fill in the Server Details for the object store. Use the server name and endpoints provided to you via tech support or the RackCorp Portal
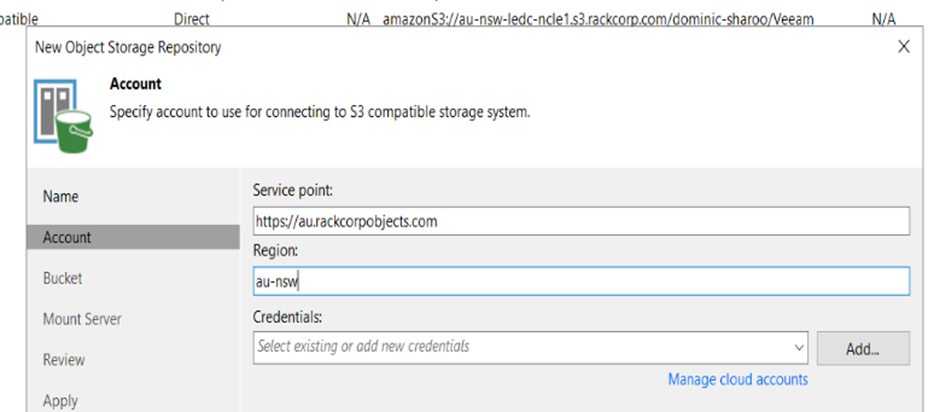
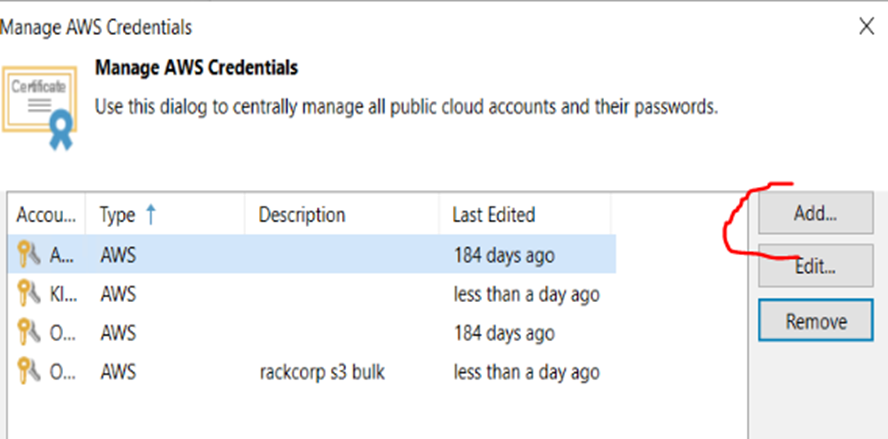
6. Here we will define credentials to use for the storage. Click Add and fill in credentials that should give access to the storage system. which are your ACCESS KEY and SECRET
7. Once added, select the credential as default from the list and hit NEXT.
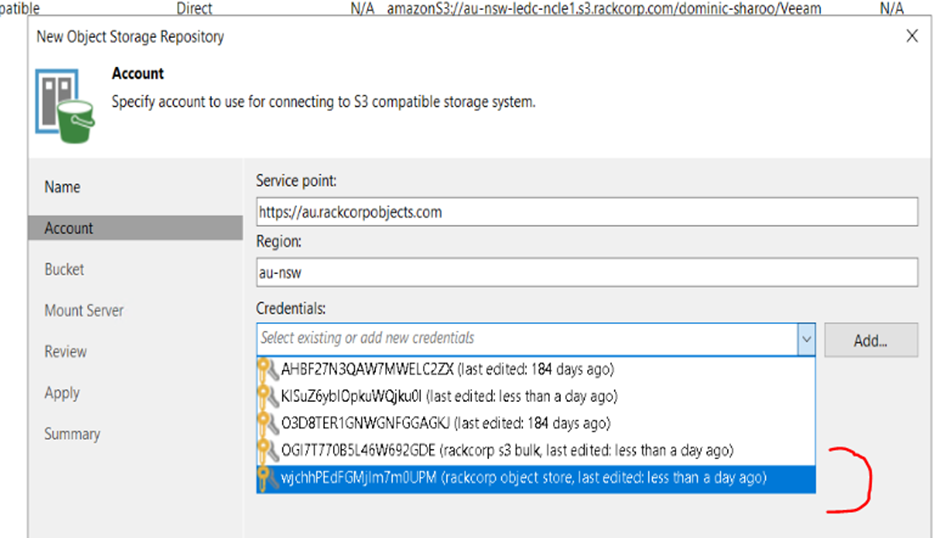
8. If the credential is valid, veeam will read back the buckets avalibe to you under your credential
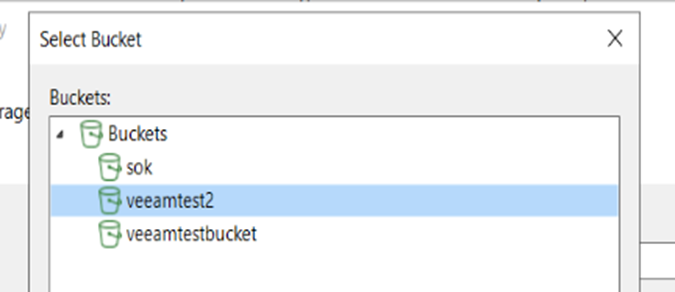
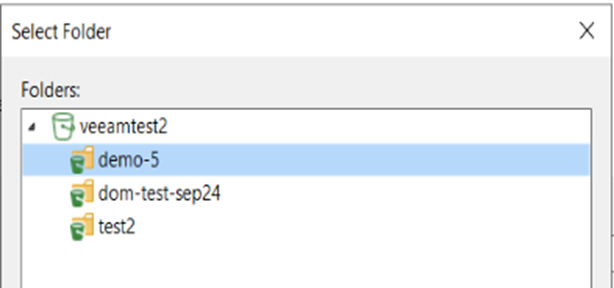
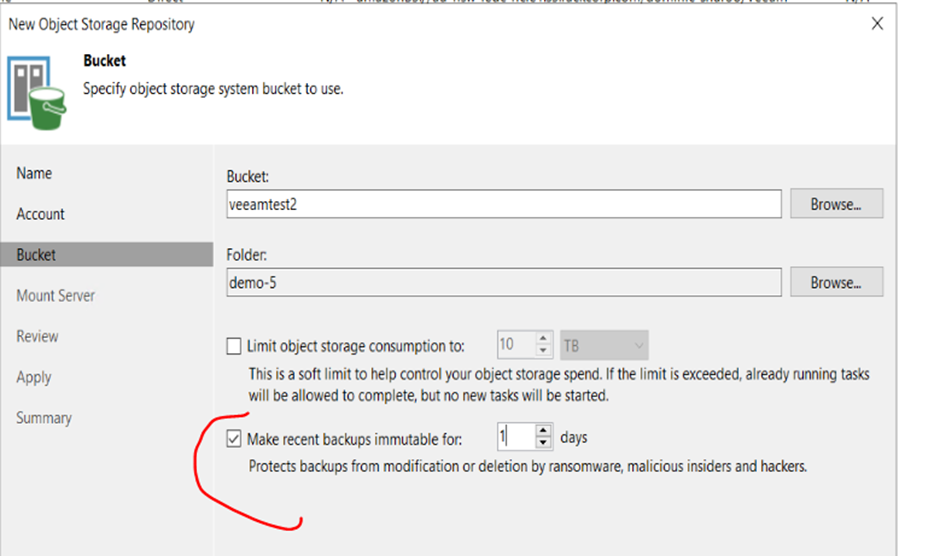
A bucket should have been pre-created for you, select it. Veeam will place its backups automatically into a SUBFOLDER of the bucket. Eg BUCKETNAME\Veeeam
But feel free to create a subfolder if you wish for Veeam to use
Eg BUCKETNAME\Backups
9. Once you have selected your bucket and folder, it is important to enable IMMUTABLE. The setting is definable by user but if we are doing a daily backup a 1 day immtuable is fine. Press NEXT to continue
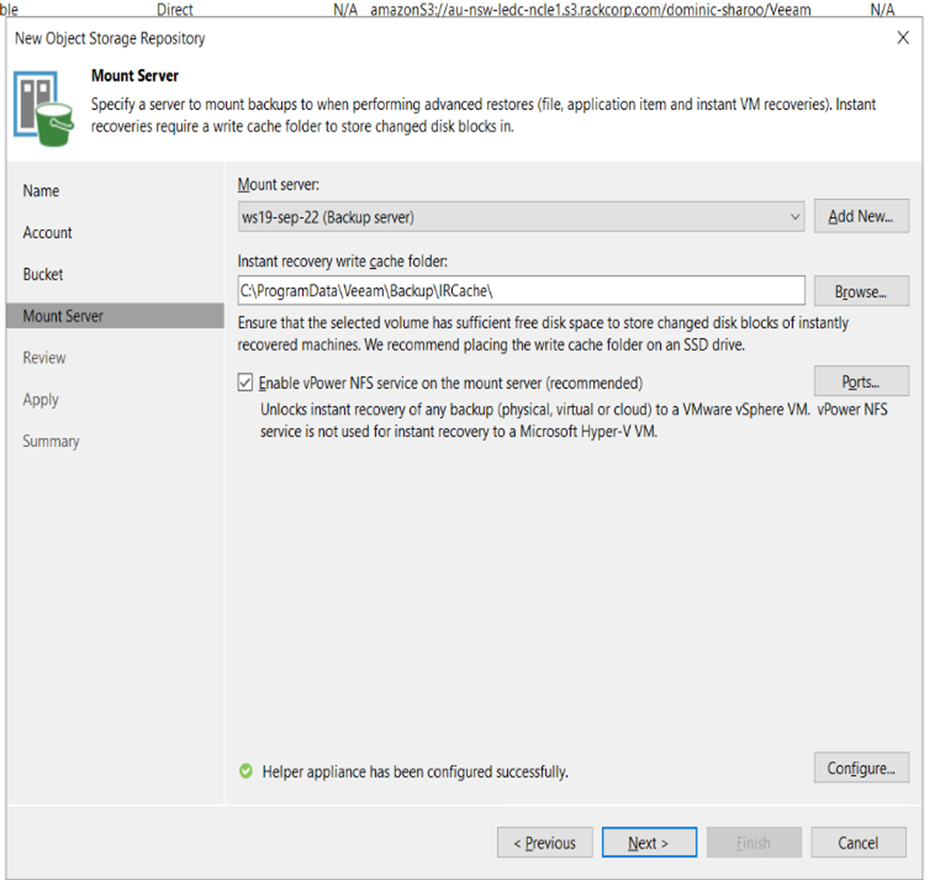
10. We dont need to modify any settings on the mount page, hit NEXT.
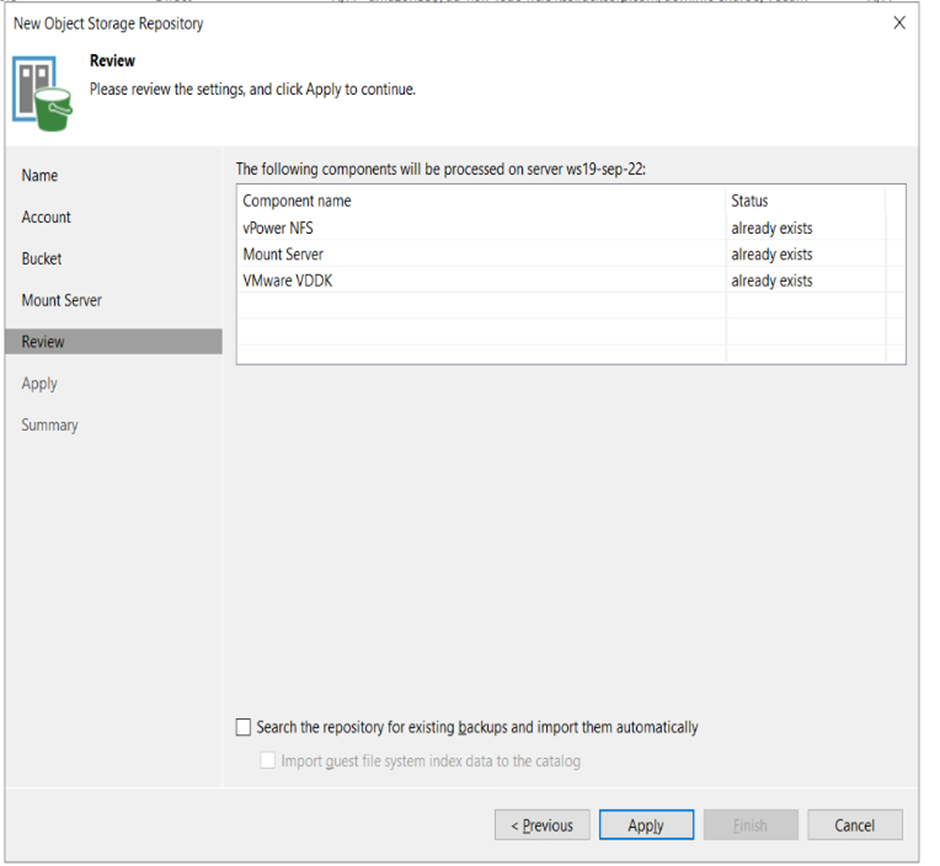
11. Review your settings here. IF you are aware that you have existing backups in your storage bucket you can import them here by selecting the option. Hit NEXT.
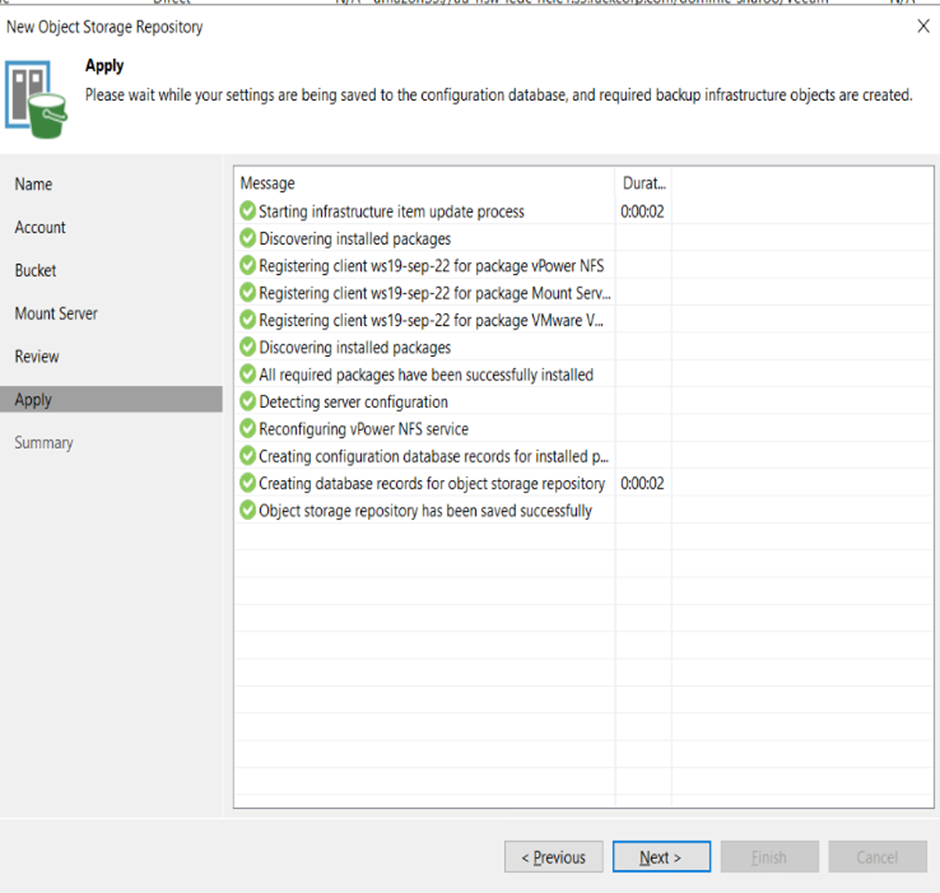
12. The apply page will execute your settings against the server. There should be no errors (red marks here). When done hit NEXT
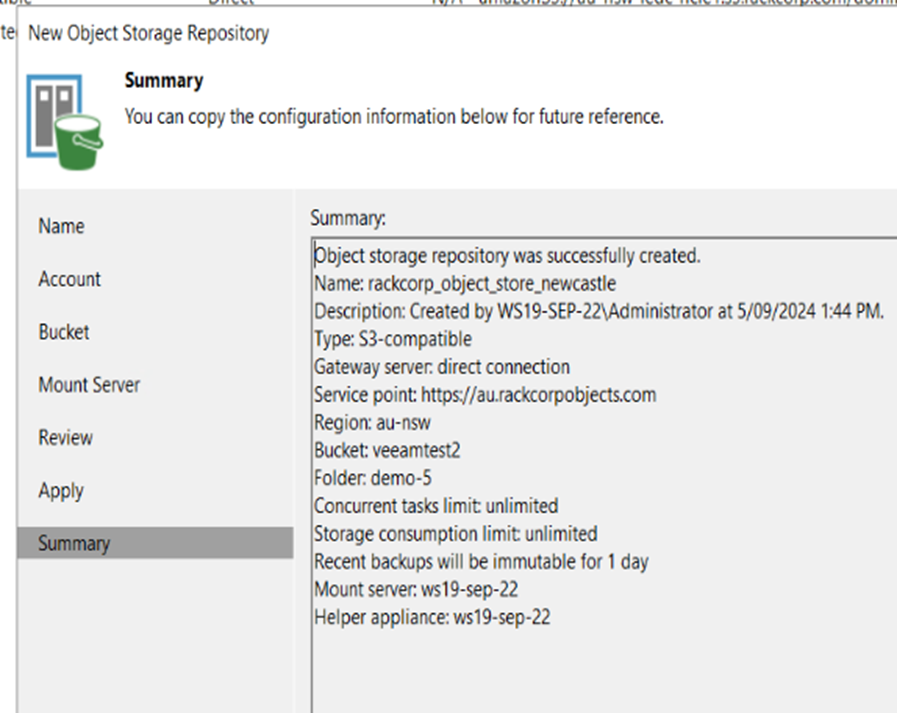
13. On completioin we have the Summary page which should be reviewed.
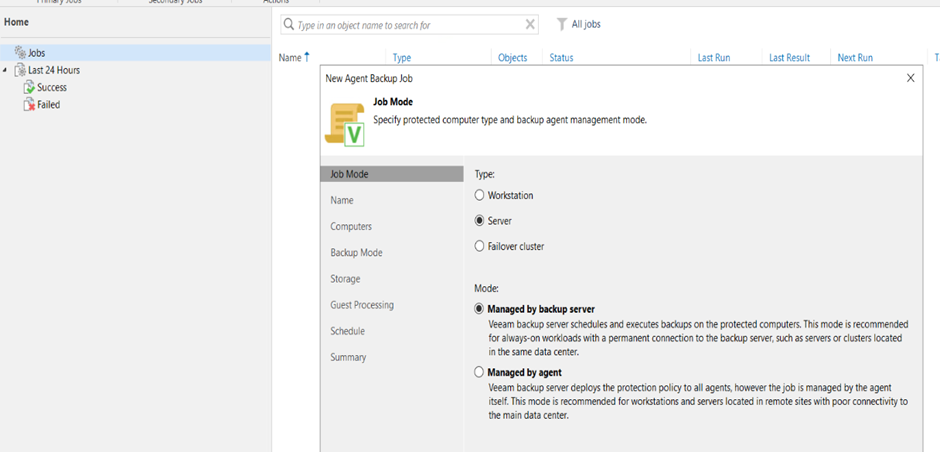
Create a Backup Job
We have successfully created the object store, we wll now create a backup job to backup our files into the object store directly.

Here we can see the 'legacy' S3 storage system and our Object Store system (in blue), both use the S3 API command set however.
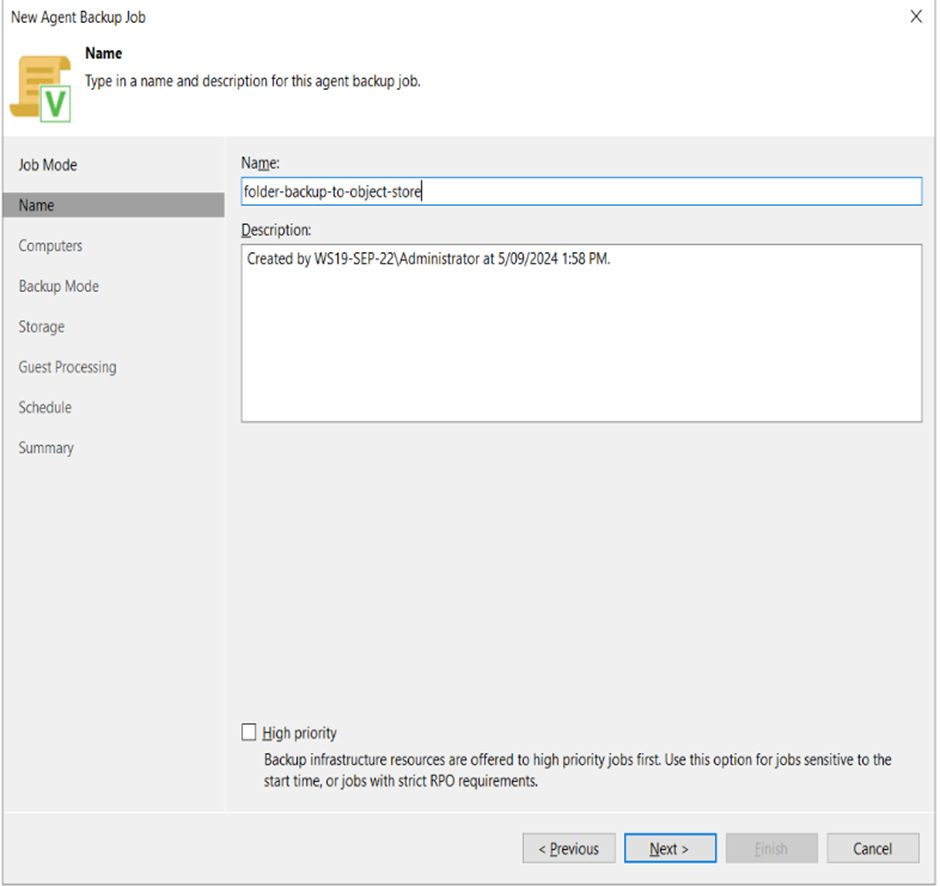
2. Make sure to add a descriptive title to the backup job as by default the placeholder names are vague
3. Add the machine DNS name that will be backed up
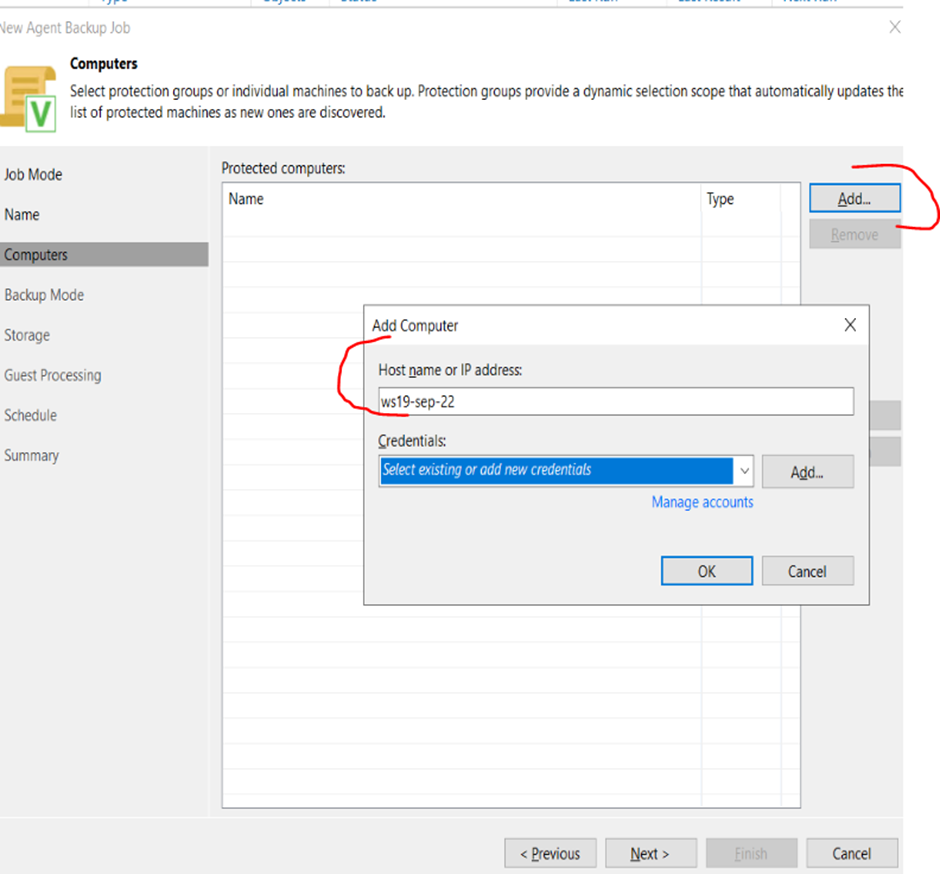
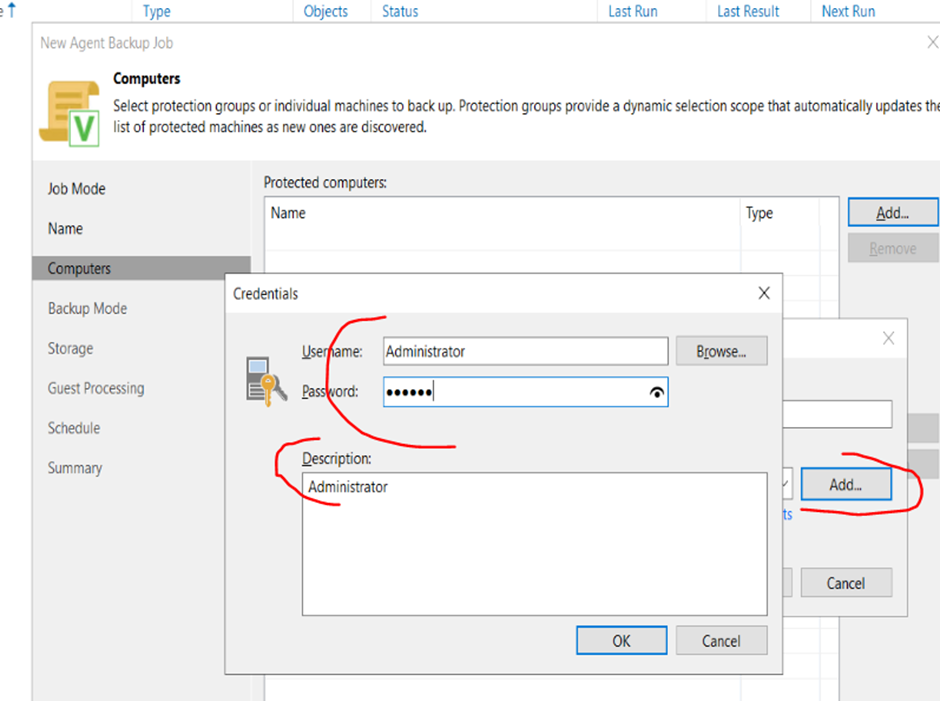
4. On the same window, Press either add or manage accounts. Here you will define access credentials username/password for the machine that needs to be backed up
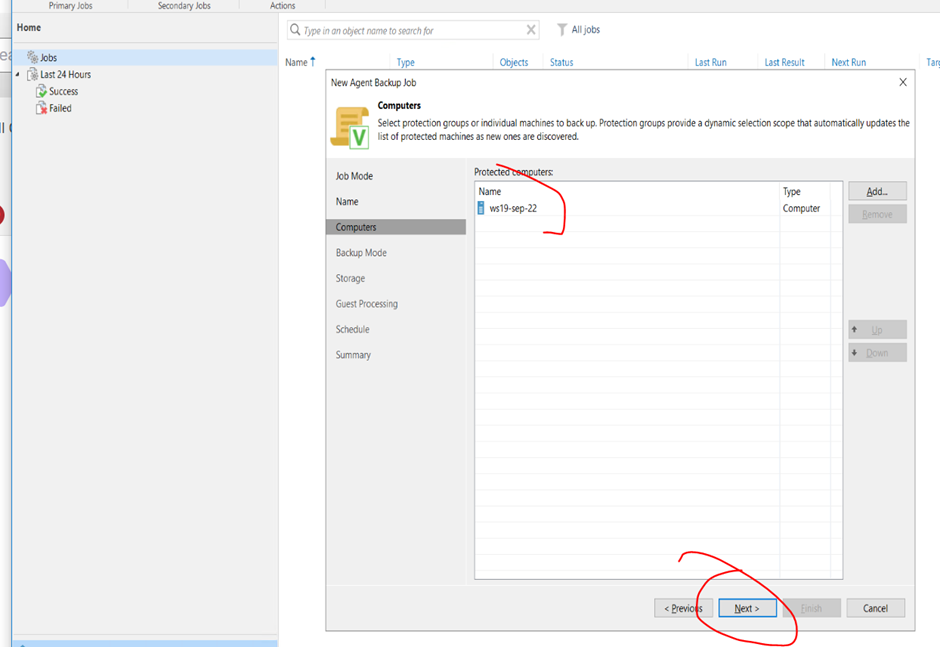
5. Return to the Computers window and ensure your desired machines are added successfully and proceed.
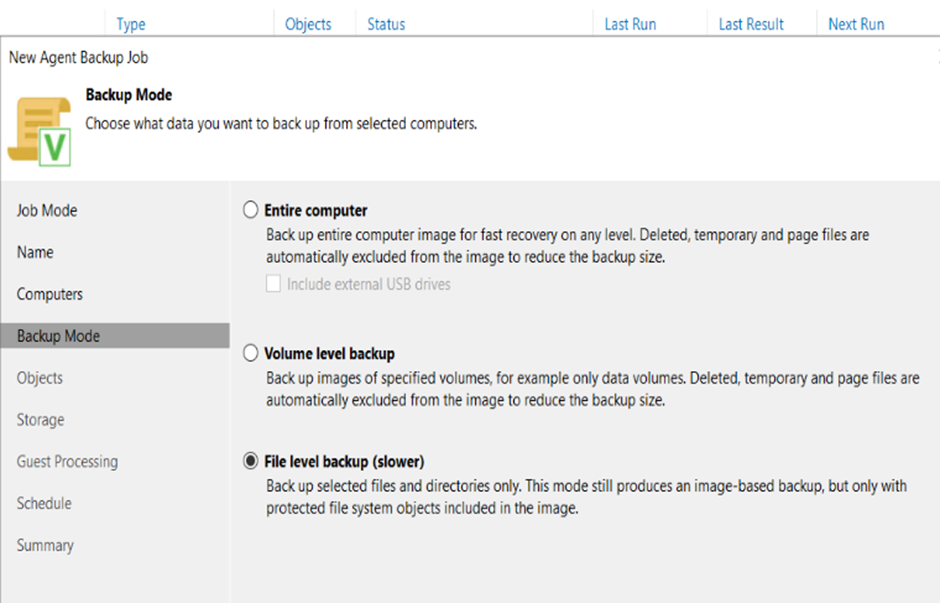
6. Under backup mode, choose your desired backup source. for this example we will be backing up the C:\PAYLOAD folder so we choose file level backup
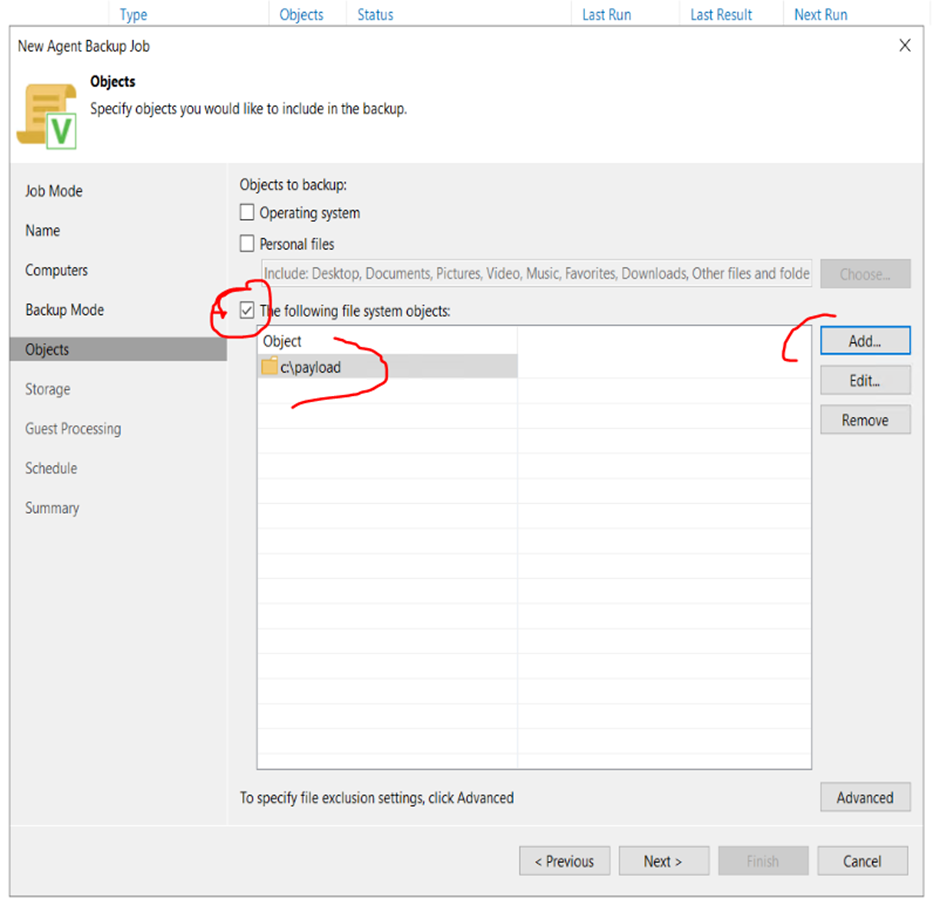
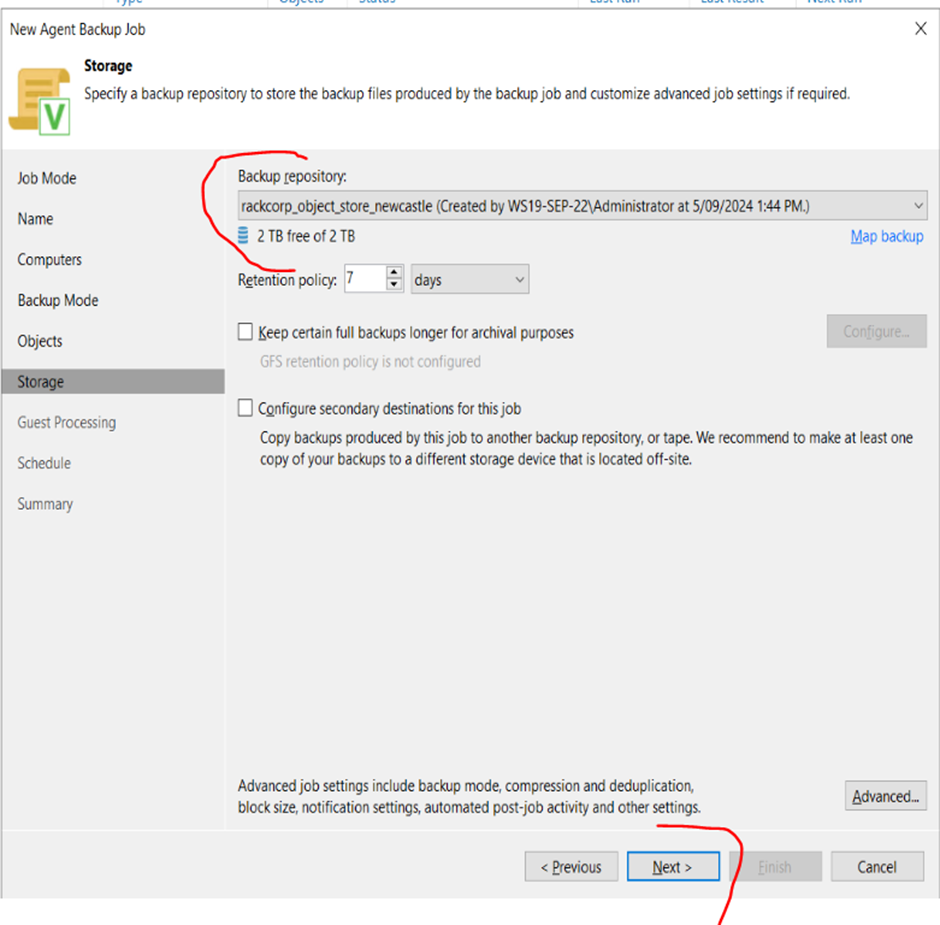
7. The next page is the BACKUP REPOSITORY screen. By default it will suggest the repository local to the backup server itself. n the dropdown box, select the object store we added.
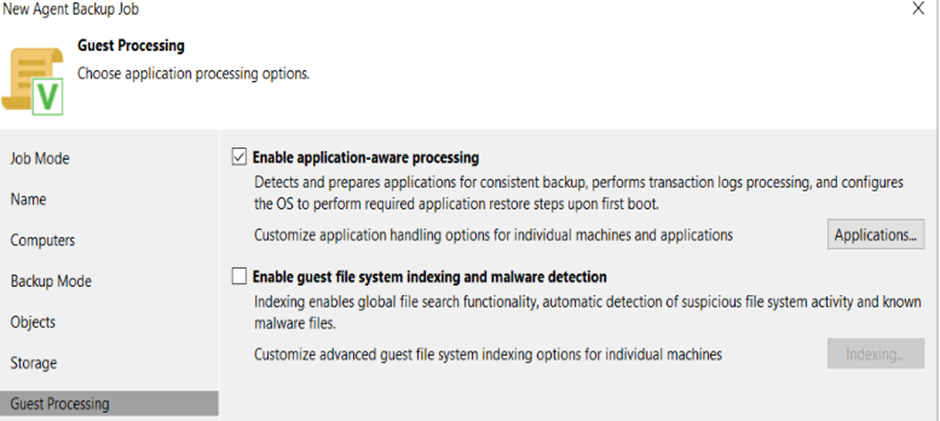
8. Indexing and Malware protection is optional, Select this if you originally had advanced indexing enaled on the windows machine you will be backing up
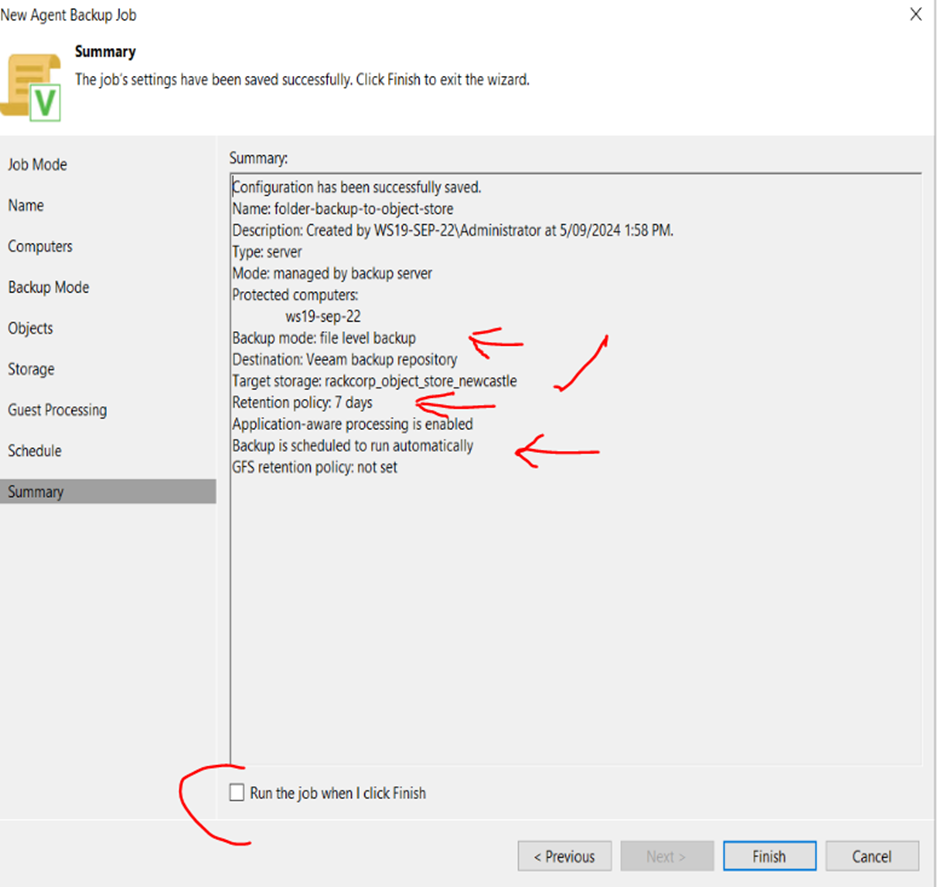
9. Review your backup schedule op[tions. Select run automatically to enable a backup schedule . To preserve bandwidth you can enbale the Terminate Job checkbox to force backups only duing your defined off peak hours

10. Review your backup job settings. Within a few minutes the backup should start. You will not see an progress immediately. To run the first pass of the job without waiting for the schedule select the Run tis job tickbox
11. Once a few minutes have passed, you can monitor the status and statistics of the backup job. From here on, the backup job will adhere to your defied schedule.

No comments to display
No comments to display